
Bone density is a key factor in bond fracture prevention. Bone is made of cells that die and regenerate. When this process is compromised, the risk of fracture arises. During the early stages of life, we can ensure that we intake and store calcium through food to build up our bones, but after a certain age (about 30), the body stops absorbing calcium, and the storage that we created is now our reserve for the rest of life. Cell Regeneration in Bone and Other Body’s Tissues The body’s cells, like muscle cells, skin cells, tendon cells, ligament cells and even bond cells, are in constant change via a process called cell regeneration. Old cells die off and they get replaced with new cells. In the case of bone, the cells that allow this process to happen are called osteoblasts. While we age, this process slows down, meaning that cells would still die, but they don’t get replaced. A typical example is a woman going through menopause. Estrogen, which is the hormone responsible for bond metabolism, allows the activity of osteoblasts. During menopause, indeed, women have a drop in Estrogen production, and osteoblasts are not as operative as they used to be. Strength Exercises and Cell Regeneration As this meta-analysis shows, strength exercises are a positive stress stimulus for the body and can help the osteoblast work harder and maintain bone cell regeneration. When the body perceives stress as physical resistance, it does its best to establish a reparation mechanism. So whenever we pick a weight against gravity, the body would implement a regeneration of the tissue that are used to complete this action. Who Is at Risk of Losing Bone Mass? There are several factors that can contribute to decreased bone mass: Age: Bone density typically peaks in early adulthood and declines with age. Gender: Women, especially postmenopausal, are at higher risk due to hormonal changes that accelerate bone loss. Family History: A family history of osteoporosis can increase risk. Body Size: Individuals with smaller body frames may have less bone mass to draw from as they age. Hormonal Levels: Thyroid imbalances and reduced sex hormones can lead to bone loss. Dietary Factors: Low calcium and vitamin D intake contribute to diminished bone density. Lifestyle Choices: A sedentary lifestyle, excessive alcohol consumption, and smoking are linked to weaker bones. I have included factors like dietary and hormonal levels in the above list. Bear in mind that taking supplements such as calcium and vitamin D (which helps retain calcium) could have severe contraindications. So, always talk to your doctor or specialist about the intake of supplements. How to determine Bone Density? To determine bone density, there is a diagnostic test called Dual-energy X-ray Absorptiometry (DEXA or DXA). This non-invasive procedure measures the mineral content in bones, usually in areas like the spine, hip, or wrist, to assess bone density and identify potential risks of osteoporosis or fractures. The results are given as a T-score, which compares your bone density to the average peak bone mass of a healthy young adult. A T-score of -1.0 or above is considered normal, while a score between -1.0 and -2.5 indicates low bone mass (osteopenia), and a score of -2.5 or lower suggests osteoporosis. Other methods, like ultrasound or quantitative computed tomography (QCT), can also assess bone density, but DEXA remains the gold standard for bone health evaluations. Mobility before strengthening So far, we have discussed how strength exercises are a good way to maintain bond density. Still, I would not recommend that anyone who is not into strength exercise and has bone density issues go and start lifting heavily. Why (?), you may ask. Well, before we start lifting heavy, we want to ensure that the body mechanics are optimal for it, so we better start looking into your mobility and then pass on to the strength part of things. Please be aware that mobility has nothing to do with elasticity or stretching. Those are different practices. How Can We Achieve Great Mobility For people who decide to take a journey to ensure an optimal level of mobility and then strengthen the body, the first step is to assess their joint mobility with active and passive range of motion. After that, we could use a combo of Myotherapy treatment and mobility exercises to ensure they can quickly pick up the best of their mobility capacity, given their subjective presentation. And here is a list of mobility exercises which we may look into at first: Hip Openers to improve range of motion in the pelvis and lower back. Ankle Drills to support proper weight distribution in weight-bearing exercises. Thoracic Spine Mobility Exercises to prevent excessive strain on the lower back. AC Joint External rotation to ensure we can build strong rotator cuff muscles, essential for shoulder health It Is Time To Strength. How Can We Do This? Once the minimum mobility is achieved, which may take 1 to 2 weeks of training, depending on each individual and their subjective history and effort, we can start looking into more strengthening exercises. So, here is a list of different exercises that can help with strengthening, written with the progressions to follow: Calf raises with double leg, single leg and weight Hamstring and Quads Curl that gets weight added as weeks go by Standing Adduction and Abduction at cable machine or with resistance bend Glut Muscles training at cable machine or with resistance bend Deadlift for back and posterior chain muscle strength Squat with weights and explosion variations Cuff rotator-specific strength is Ideal before stepping into more complex arm weight-lifting Cervical muscle strength to prevent cervical headache and sore neck All of those exercises, except the cervical one, can then be modified to achieve plyometric drills and combined movement. But this is a process that would take months, and there is no rush to get to it, as I want you to be safe through out the all journey. Integrating Exercise into Myotherapy Treatment At Melbourne Massage and Treatment, I […]
Tag Archives: mobility

Blog
Back Squat: What’s your goal?
As a Clinical Myotherapist, I often work with patients who perform back squats as part [...]
Continue readingMay
Blog
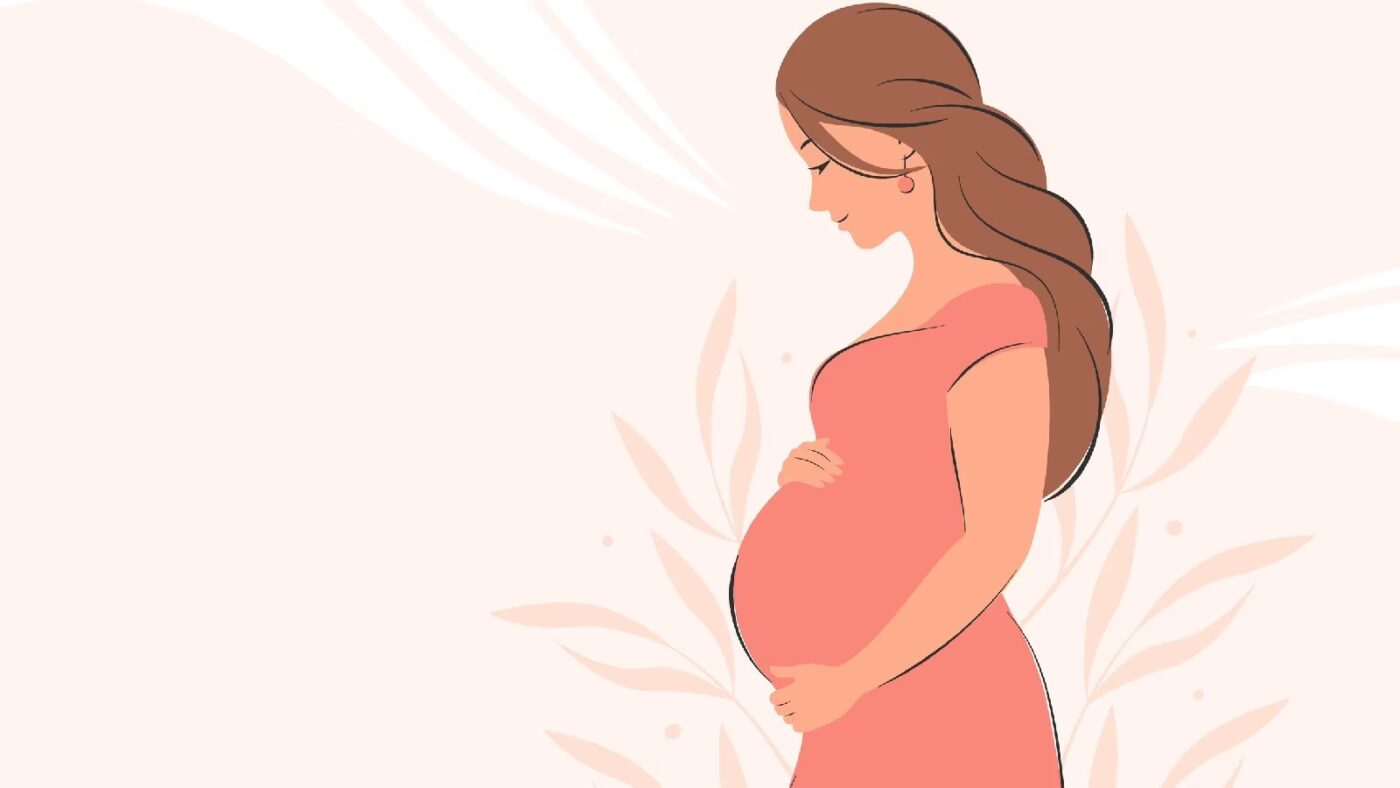
Pregnancy and Lymphatic Drainage Massage: Safety and benefits
Pregnancy brings many wonderful changes, but it can also bring some discomforts, especially as the [...]
Continue readingMay

Blog
The Star Excursions Balance Test
The Star Excursions Balance Test (SEBT) is a fabulous functional test that can tell us [...]
Continue readingMay

Blog
Knee Replacement Surgery: The Road to Recovery and the Role of Manual Lymphatic Drainage and Exercises
Knee replacement surgery, or knee arthroplasty, is a transformative procedure designed to alleviate pain and [...]
Continue readingMay

Blog
Muscle Tension Headaches and Migraines: Key Differences and Treatment Options
Muscle tension headache and migraine are two different types of presentation that have in common [...]
Continue readingMay

Feb
Whiplash is a common neck injury caused by a sudden and forceful back-and-forth motion of the head. We often see this in patients who go through a car accident, contact sports injuries (AFL, rugby or even Soccer), or falls. While whiplash is usually not life-threatening, we now know that it can cause persistent pain and discomfort, affecting daily activities. Therefore, it is important to understand its symptoms, causes, and the best exercises for recovery, which can help individuals manage and overcome this condition effectively. Common Causes of Whiplash Whiplash is a term used to describe a fast rocking motion of the cervical area and is most frequently caused by: Car accidents: Rear-end collisions are the leading cause, as the sudden force propels the head forward and backward. Sports injuries: Contact sports like football, boxing, or hockey but even AFL, Rugby or even Soccer increase the risk of whiplash injuries. Falls: Slipping and falling can cause the head to jerk suddenly, leading to whiplash. Physical assaults: Blows to the head or sudden jolts, such as those experienced in shaken baby syndrome, can result in whiplash. What are the consequences of Whiplash for the cervical ligaments? The consequences of whiplash for the cervical ligaments can be significant, leading to long-term instability and chronic pain. When the ligaments are overstretched or torn, they lose their ability to support the cervical spine, resulting in properly: Reduced Stability: Weakened ligaments can no longer provide adequate support to the cervical vertebrae, leading to excessive movement and an increased risk of further injury. That’s why stretching is not recommended either. Chronic Pain and Stiffness: Persistent discomfort may arise as the muscles attempt to compensate for the lack of ligament support. Increased Risk of Degeneration: Ligament damage can accelerate wear and tear on the cervical joints, potentially leading to conditions such as osteoarthritis. Neurological Symptoms: Instability in the cervical spine may irritate or compress nerves, leading to headaches, dizziness, or numbness in the arms. Symptoms of Whiplash Whiplash symptoms can range from mild discomfort to severe pain, and they often appear within hours or days of the injury. Common symptoms include: Neck pain and stiffness: One of the most prevalent symptoms, often worsening with movement. Headaches: Typically originating from the base of the skull and radiating toward the forehead. Shoulder and upper back pain: The impact can cause muscle strain in surrounding areas. Reduced range of motion: Difficulty moving the neck due to stiffness and discomfort. Dizziness and fatigue: A common reaction as the body copes with the injury. Tingling or numbness in the arms: Nerve involvement may lead to sensations of pins and needles. Cognitive issues: Some people experience memory problems, difficulty concentrating, and irritability. Those symptoms may not present all at once, and they can belong to other presentations, while whiplash did or didn’t happen anytime before. That’s why when we go through a clinical history taking, as Myotherapist, we take our time to dig into your past and your body habits, as this can give us important information about your current presentation and what we can do to improve it. Why Can Whiplash Become a Lifelong Issue? In some cases, whiplash can become a chronic condition due to the instability of cervical ligaments. Cervical vertebrae can be divided into two parts, Mobile and Stable joints. C1 to C2 are the mobile ones, whereas C3 to C7 are the stable ones. Now, if along a whiplash incident, the ligaments of either the mobile or, most luckily, the stable side get strained, the muscles surrounding that segment of the joint would have to work harder to maintain stability. This would lead to to ongoing discomfort, reduced mobility due to pain and muscle spasms, and increased vulnerability to future injuries. If left untreated or managed improperly, this is how the condition can become chronic and lead to other injuries along the way. Importance of Thoracic Mobility Thoracic mobility plays a crucial role in preventing the chain effect of mobility and stability issues between the thoracic spine, lower cervical, and upper cervical regions. If the thoracic spine is stiff or restricted, the lower and upper cervical spine must compensate, leading to increased strain and pain. Improving thoracic mobility through targeted exercises can help reduce this compensatory stress, allowing for better neck function and reducing the risk of chronic discomfort. In a case of a previous history of whiplash, maintaining good thoracic mobility would allow the cervical area to focus on its duties, so stability for the lower portion and mobility for the upper. Reducing the risk of overcompensation and muscle fatigue. Effective Exercises for Whiplash Recovery A structured exercise program is essential for whiplash recovery. This program should begin with isometric exercises to restore basic cervical movement, progress to concentric exercises to rebuild strength, and eventually include thoracic mobility drills to enhance overall spinal function. Phase 1: Isometric Exercises for Early Recovery. For the first 2 weeks post-injury, 5 to 7 days a week. Isometric exercises help activate muscles without excessive movement, providing a stable foundation for recovery. This step is essential to start driving more blood to the area irritated by the whiplash and also allow the central nervous system to feel confident in perceiving the cervical structure moving without pain. Isometric Neck Holds: Place your hand on your forehead and gently press against it without moving your head. Push only 25% of your strength, as it has to be a pain-free exercise. Hold for 5-10 seconds and repeat 5 times. These exercises can be done in any cervical movement, such as extension, lateral flexion, or rotation, by using your hand as a resistance and pushing always at 25% of your strength. The strenght of push does not ever progress, what you will progress within isometric exercises are the time fram of push, repetitions and sets. Phase 2: Concentric Strengthening Exercises. From week 3 post-injury onwards,3 to 5 times a week. Once the pain subsides, which we would expect to happen in 2 weeks about it, gradual […]

Oct
At Melbourne Massage and Treatment in Fitzroy North, we frequently encounter clients dealing with tennis elbow (lateral epicondylitis) and golfer’s elbow (medial epicondylitis). These conditions can cause significant discomfort and limit your ability to enjoy sports and everyday activities. While they are often associated with repetitive arm and wrist movements, it’s essential to consider how poor shoulder mobility and stability can contribute to these issues. What Are Tennis and Golfer’s Elbow? Tennis Elbow Tennis elbow affects the outer part of the elbow, causing pain and tenderness on the outside. This condition typically arises from overuse of the forearm muscles, especially those responsible for wrist extension. Activities such as painting, or even prolonged computer use, or overstreching of extensor muscles can trigger this condition. Golfer’s Elbow Conversely, a golfer’s elbow affects the inner part of the elbow, leading to pain on the inside. This condition is commonly associated with activities that require gripping, flexing the wrist, or repetitive forearm movements, such as golfing, throwing, or lifting. In this presentation is the common flexor tendon that get’s irritated, and refer with pain. The Connection to Shoulder Mobility and Stability While tennis and golfer’s elbow are localized conditions, they often stem from dysfunctions higher up in the kinetic chain, particularly in the shoulder. Poor shoulder mobility and stability can lead to compensatory patterns that place undue stress on the forearm and elbow joints. Shoulder Mobility Limited shoulder mobility can restrict the natural range of motion for various activities. For instance, if your shoulders lack mobility, you may overcompensate with your forearm muscles during tasks that require reaching, lifting, or throwing. This overcompensation can lead to strain, resulting in conditions like tennis or golfer’s elbow. To maintain proper shoulder mobility, you want to ensure the use of the glenohumeral joint along your exercises and move it with specific drills, as this would stimulate the joint synovial fluid and maintain the joint lubricated. On the other hand, if the joint is hypermobile, we should look into how to stabilize it better. Shoulder Stability Shoulder stability is crucial for maintaining proper alignment during movement. Weakness in the shoulder stabilizers can cause the shoulder joint to become unstable, leading to altered movement patterns. When the shoulder isn’t stable, the body often compensates by engaging the forearm and elbow excessively, increasing the risk of injury. As mentioned in the paragraph above, this is what would occur when someone presents with a hypermobility body. In the hypermobility presentation, the ligaments are more lax and don’t hold back the joint movement as expected. Assessing and Addressing the Issue At Melbourne Massage and Treatment, we recommend a comprehensive approach to address tennis and golfer’s elbow effectively: Assessment of elbow epicondylitis Understanding the root cause of your pain is vital. During an initial consultation, we still mainly focused on your elbow presentation and addressed what movement reproduced the discomfort. But not only that. Throughout a tailored investigation, we will address what could be the root cause of the problem. This way, it would be easier to develop a tailored treatment plan. Treatment for elbow epicondylitis Massage Therapy: Targeted massage can alleviate tension in the forearm and improve blood flow, promoting healing. MDN: Myofascial Dry Needling plays a really effective role in tendinitis management. It focuses on targeting the underactive muscles, restoring the neural connection between the central nervous system and muscle, and desensitizing the painful area. Mobilisation: Mobilisation is an ideal technique to address mobility issue, and improve the range of motion of a joint. For epicondylitis presentations, the mobilisation could focus on wrist, elbow or shoulder. This would be based on the finding along the assessment. Strengthening Exercises: In the exercise program, we will initially focus on exercises that can desitentize the elbow area, such as isometric holds, and then move to eccentric and concentric exercises. In this second step, we would already focus on specific shoulder mobility or stability exercises, as needed. Education Understanding proper biomechanics can empower you to make lifestyle changes that prevent future injuries. Giovanni will guide you through exercises and techniques to maintain shoulder health and prevent elbow pain. Conclusion Tennis and golfer’s elbow can be debilitating, but addressing shoulder mobility and stability is key to recovery and prevention. At Melbourne Massage and Treatment in Fitzroy North, Giovanni is dedicated to helping you achieve optimal function and well-being. If you’re experiencing symptoms of tennis or golfer’s elbow, don’t hesitate to contact Giovanni or Book Now your 15-minute free phone consultation to learn more about a personalized assessment and treatment plan. Together, we can work towards getting you back to the activities you love, pain-free. FAQ Q: What are tennis elbow and golfer’s elbow? A: Lateral epicondylitis, affects the outer part of the elbow, causing pain due to overuse of the forearm muscles, particularly those responsible for wrist extension. Common activities that can trigger it include painting and prolonged computer use. Medial epicondylitis, impacts the inner part of the elbow, leading to pain often associated with gripping, flexing the wrist, or repetitive movements like golfing or throwing. Q: How are shoulder mobility and stability related to these conditions? A: Poor shoulder mobility can lead to overcompensation by the forearm muscles during activities requiring reaching, lifting, or throwing. Similarly, weak shoulder stabilizers can cause the shoulder joint to become unstable, forcing the forearm and elbow to work harder, which increases the risk of injury. Both factors contribute to the development of tennis and golfer’s elbow. Q: What are the signs of limited shoulder mobility? A: Signs include restricted movement during overhead activities, difficulty reaching behind your back, and discomfort during routine tasks that involve lifting or throwing. These limitations can lead to compensatory movements that stress the elbow. Q: How do you assess tennis or golfer’s elbow at Melbourne Massage and Treatment? A: We conduct a thorough assessment that focuses on your elbow presentation, identifying movements that reproduce discomfort. This investigation also explores potential underlying issues related to shoulder mobility and stability, helping us understand the root […]

Jun
Biomechanics is a branch of biophysics, and it studies the structure, function biomechanics is a branch of biophysics, and it studies the structure, function and motion of the mechanical aspects of biological systems using mechanical methods.d motion of the mechanical parts of biological systems using mechanical methods. Why is Body Biomechanics important? The way we move is a crucial component of injury prevention. Ensuring we are moving using our advantage, forces like gravity and body weight can help us reduce the chance of injury and improve the load capacity. To do so, we must train with a specific protocol that ensures excellent mobility to achieve muscular strength. What is a force? We can define a force as an influence that can change the motion of an object. Gravity is an acceleration that becomes a force when applied to a body. This concept was well explained by Netwon, with the announcement of Newton’s second law that can be summarised with F=m*a. F is the force, m is the mass, and a is acceleration. In the case of acceleration of gravity, it does measure 8.91 m/sec2. Said so, this means that we are constantly accelerated towards the ground. That’s why we don’t float in the air. And to better use this acceleration to our advantage, we have to move weight using the right angles. To better understand body biomechanics, we must introduce the idea of Moment Arm, Vector and Torque. What are Moment Arm Vector and Torque? And why are they essential for understanding human body biomechanics? The moment arm is the distance between the force and the joint that hold that force back. Think of yourself holding a water bottle up with your arm extended out. The joint holding up is your shoulder, the force is the combination of the bottle per the gravity a. (F=m*a). A Vector is the direction in which a force is applied. In this case, the direction is 90° downwards. Lastly, the Torque is the rapport between the Force and the Moment Arm. So, the shorter the moment arm, the easier it would be to lift an object. Understanding this concept would make your body biomechanics application much more accessible. Body biomechanics at the gym. When training at the gym, body biomechanics are fundamental. I often get clients in post-gym injury who don’t know much about mobility training, its importance, and body biomechanics. For example, keeping the weight so the bar is as close as possible to the leg is essential when doing a deadlift. This is because the weight has to be close to the Centre Of Gravity of the body, or the moment arm would be increased, so the torque required to lift the weight would increase too. In this case, the centre of gravity corresponds to the area where the actual torque is required, the lumbar area. Indeed, it is easy to hurt yourself on the lumbar when you bring that bar too far from your body. Body Biomechanic and Thai Massage Traditional Thai Massage, as offered at Melbourne Massage and treatment, tends to use the body biomechanics at its best. Even Thai Yoga exercises are based on the biomechanics principle, using lever and gravity as an advantage to create pressure on your body and reduce tension and heal aches. This, indeed, is what makes Traditional Thai Massage so unique. It is a technique of work where you don’t need great force, it is enough to use your body weight. And because it is delivered on a ground mat, it is easier to apply the biomechanics principles.

Dec
As previously spoken in another blog post, sitting on the floor and working at the pc would be a better anatomical position than sitting on a chair. Why does sitting on the floor work better than sitting on a chair? Sitting on a chair is uncomfortable, especially in the long term. As a massage therapist, most of my clients are people who have cervical pain or suffer from headaches. Sitting at a desk for hours does more damage than you may realise. So, let’s start with the lower body portion. Staying seated on a chair does direct pressure on the thigh, and by doing so, muscles like the hamstring and gluteus muscles get compressed. By compressing this group of muscles, they get weak and stop functioning as they should. In addition, direct pressure is also applied to the sciatica nerve, the main nerve of the lower body portion. The piriformis often compresses the Sciatica nerve. This muscle runs beneath the Gluteus Max and connects the medial portion of the sacrum to the greater trochanter of the femur. So, the deactivation of those muscles would then manifest itself when we try to walk or, in any case, extend the leg. As the “firing pattern” blog post shows, the hamstring and gluteus max muscles are crucial in leg extension and help prevent lower back pain. This is what happens to the muscle part of the lower body portion. But this is not the only issue the body faces with so many hours sitting on a chair. There is more. So sitting on a chair does limit the body’s movement. The decline of the body’s movement creates a cascade of side effects, including mobility reduction in joints like the Hip, Ankle, Feet, and Thoracic. As all those joints don’t move, there is also a diminish in the proprioception body/brain. Another issue is the compensation of the stability joint over the mobility joint. Indeed, when a mobility joint gets stiff, the stability joint above and below would try to compensate. What’s a common finding pain-wise with sitting on a chair for long hours? The prevalent finding is a sore neck. The sore neck happens as the thoracic stuff up. Indeed the lower cervical portion of the vertebrae, which are stability joints, try to compensate for the thoracic stiffness and, in the long term, would cause neck pain, shoulder pain and headaches. Sitting on the floor can improve mobility. Sitting on the floor can help improve your mobility by allowing you to move your body in many different ways without the need to stand up. That movements are what your body needs as mobility exercises. That movement is your body’s way of improving its posture. Indeed, movement is a crucial component in pain prevention. And this doesn’t happen on a chair. How to switch habits? As for all the habit changes, this has to be gradual and not radical. So, start sitting on the floor for 1 hour a day. Give yourself the time to adapt to the change. Slowly you can incorporate more hours, but not in a row. Maybe one hour in the morning and one in the afternoon. Also, incorporate some standing time to sitting on the chair and floor. Implement change, too, within your training. You are doing something new, and your body needs to adapt. As shown in this clip, start, start implementing a habit of sitting on the floor by doing step-by-step movements: Step 1: Move one leg forward, and bend down the other knee. Step 2: Bring both knees down Step 3: Swing the lower leg to the side (either Lx or Rx) Step 4: Let your body weight go, and sit down Step 5: Now let your lower leg come forward and sit cross-leg. Step 6: Do from step 5 to step 1 in reverse By clicking here, and here you will find the links to a Thai Yoga exercise that can help a lot with improving hip mobility.

Nov
Frozen shoulder is also known as per the name “adhesive capsulitis”. A frozen shoulder as per the name is a shoulder that would barely move. Both signs and symptoms typically begin slowly and then get worse. Recovery time is subjective. Causes and Symptoms of frozen shoulder. Causes A common cause of a Frozen Shoulder is having to keep a shoulder still for an extended period, like after an accident. Even if it is not clear yet why there are also psychosomatic reasons why a shoulder can get frozen. Another reason why a shoulder could get to freeze is traumatic events, such as a high level of stress or a physical accident. On the physical level, what happen is that connective tissues that surround the shoulder joint, like a capsule, thickens and tightens around the shoulder joint, and by doing so, it does restrict the joint’s movement. Symptoms Frozen Shoulder symptoms developed in 3 different stages. The stage’s timing is subjective. Freezing stage Shoulder range of motion starts decreasing, and pain shows up/increases. Frozen stage The Shoulder would freeze up. The movement is minimal, even though it is less painful. Thawing stage In this stage, the range of motions are slowly coming back Pain can be worst at night. This may happen because of the sleeping position or because the sensory feeling is more acute at night than in the daytime when the body perceives more sensations. Suffering from Frozen Shoulder and need some help. Book now an MLD treatment at Melbourne Massage and Treatment. Risk factors for Frozen Shoulder Age and gender Women are more luckily to suffer from this condition. Also, age plays a crucial role in this type of pathology. People 40 and over are luckier indeed to develop F.S. Systemic diseases Here is a list of specific conditions that can increase the possibility of suffering from F.S.: Diabetes Overactive thyroid (hyperthyroidism) Underactive thyroid (hypothyroidism) Cardiovascular disease Parkinson’s disease Prevention There are not many preventive factors when it gets to F.S. This is because the main cause of F.S. is holding the shoulder back from doing movements, due to a previous injury, most of the time. What can help, and this is how Melbourne Massage and Treatment services come in handy is to do MLD sessions on the area surrounding the injury. How MLD can help by stimulating the lymphatic system work and boosting the recovery process. Also, MLD would help in reducing inflammation. Other massage technique such as Myotherapy or Remedial Massage and or Thai Massage, is not as effective for this type of condition. Another successful method that can help once Frozen Shoulder is already developed is by using Hydrodilatation. This methodology consists in injecting sterile water into the joint capsule to stretch the open space and bring the shoulder back to its ROM.

Oct
Sitting on the floor is the new mobility movement. Sitting at the desk and sitting on the floor. Working in the office is a challenging task for the body, and in the last few years, something made this task even worst. Covid-19 forced millions of people worldwide to work from home. Consequently, many people reduce their daily movement activity and start increasing their stress response to work and everyday life. But what does covid-19 have to do with seating on the floor, you may ask yourself? Well, for convenience, and other rules, such as hygiene too, we nowadays spend most of our time sitting on chairs. At least within Western cultural settings. Asian Squat But as we all know, floor seating is an ancient practice in the East side of the world. In our collective mind, we all can refer to Asian people squatting anywhere they can, and with not much problem. In the West, squatting is associated with going to the gym, training, and being sporty. It is funny, isn’t it?! So, that’s where covid-19 is linked to seating on the floor. I am working from home and sitting on the floor. Due to the covid pandemic, many people have started working from home. But the home ergonomics for office work differ from those in the office. In addition to this, we have to add that as big and comfortable as a chair can be, it is always a chair. Indeed, the chair is a silent killer. Sitting on a chair limits our ability to move around as discomfort arises. Think now about sitting on the floor and standing back up. For the average adult, doing this task is not a comfortable thing. Why so? Well, because we are not used to it. All this year, sitting on a chair did reduce our body adaptability to the ground sitting. Sitting on a chair for long hours would: stiff up the hips, which are in constant flexion increase pressure on the Lumbar back arch the thoracic area, with an increase in kyphosis reduce the necessity for mobility In fact, within 20 minutes of no movement, a muscle would adapt to the shape it is sitting into. On the other hand, as the muscle starts losing its neuroplasticity, the joints controlled by those muscles would start stiffening up too. This is such a domino effect that it would break the equilibrium along the stability/mobility joints chain. How to prevent this? Well, sitting on the floor is a good start. Sitting on the floor comes with the benefits of more mobility options. As we may feel uncomfortable with the sitting position, changing position would be a spontaneous and comfortable act once on the floor. But as we are so used to sitting on chairs, starting sitting on the floor for 8 hours a day can be challenging. So, rather than sitting on a chair all day, initially switching between floor sitting, chair and standing up is good. This process would allow the body to slowly break the bad habit of rounding onto the desk from the stiff chair seating. Also, the body is not designed to either sit on a chair or stand up for so long for so many days. So the habit of changing position would improve mobility, and with it, many other things would come down to and ease. In conclusion, to improve the Upper Cross Syndrome (UCS) presentation of someone who spends long hours sitting at a desk, the steps to take are: reduce the symptoms of pain and discomfort in the Cx area start losing up the thoracic area Improving hip mobility allows the person to spend more time on the floor. The work that needs to be done within the thoracic area is to lose the vertebrae by doing some mobs and reducing tension on the lat dorsi muscle. In this next post, we will look into the following: How to sit on the floor and how to stand back up Exercises that can help to improve the floor seating time. Would you like to improve your mobility? Book Now a Thai yoga class with Giovanni or a Massage session to learn more about what can help you.

Oct
Mobility is the degree to which a joint can move before being restricted by surrounding tissues. Not all the joints taught are considered mobility joints. The Mobility and Motility Joints Theory Starting from the big toes joint and moving up the body to the upper cervical joints, we can count one by one a mobility joint alternating with a stability joint. So this would be like this: Big toes – M. Metatarsal – S Ankle -M Knee – S Hip – M Lumbar -S Toracic – M Lower Cervical – S Upper Cervical – M Shoulder – M Elbow – S Wrist – M Tarsal – S Fingers – M The major differences are: A Muscular structure surrounds mobility joints Stability joints are surrounded by ligaments and tendons Mobility joints move in more planes than stable ones. The stability joints, indeed are essential to the body mechanics to ensure that gravity and force applied to the body by its own weight are well distributed. First thing first. Now, if we plan to strengthen our body, like by going to the gym, running or doing any sports activity, ideally we would like to ensure that the mobile joints can deliver the minimum required of ROM. Why? Well, if the mobility joints are stiff or not mobile enough, the priority of moving would not diminish and the stability joints, are going to do their best to compensate. But let’s see this with an example. Mark (name of fantasy) who is an office worker, spends about 40 hours a week at his desk, and to reduce the work and life stress decided to start a routine run 3 to 4 times a week for 1 hour per time. Mark thinks that to go for a run, you don’t need training and has no clue about the mobility, stability and strengthening chain. After a few weeks that is enjoying his new routine, Mark start experiencing knee pain. Mark also didn’t realise that due to the long hours of sitting at the office, his hips joint are tight, and his external rotators, such as the gluteus max and piriformis, are tight. As per consequence, when Mark stands up, the angle of the gate (AOG), which refers to the rotation of the foot in a standing position, is up to 4 toes per side. (3 toes is the max AOG we expect in the foot). Now, what happens next is that when Mark goes running, his ankle mobility and hip mobility are visibly restricted. So, he will lean forward with the upper body, by having tight hips, and strike the floor with the feet externally rotated, so all the body weight will be loaded in the middle of the foot. As a result, the Stability Joint that sits between the ankle and hip, so the knee, will compensate for the other two joint dysfunctions. In this case, the knees would take extra pressure medially and stretch out laterally. So, what should Mark do?! Well, initially, to stop the pain from happening, stopping running would be a good idea. Said so, that would not fix the problem. What Mark should do, is: Massage to boost the change within the tight joints and reduce the knee pain Start a mobility program to improve the Hip and Ankle functionality Exercises that aim to reduce tension in the external rotator reinforce the internal rotator (Gluteus Med and Min) Train on how to run These are the basic steps to implement a model of Mobility, Stability, and Strengthening. Does this model apply to other sports activities? Of course, it does. Visualise your body as a giant mechanical machine made of rope and hinges. The mechanical result will not be ideal if the hinges are stiff and the ropes are tight. To improve the result, each component needs to be looked after. So what message would be the most recommended? Along with Melbourne Massage and Treatment services, Thai Massage, Remedial Massage, and Myotherapy are soon the most recommended services Giovanni offers to improve the body’s mobility. Regarding mobility training, Thai Yoga is also an effective way to improve joint mobility, as these exercises focus primarily on improving joint mobility. What there is to consider is the patient’s presentation, medical history and pre-existent injuries. If there are no significant concerns, I suggest Thai Massage as the best approach. For people who have presentations such as Diabetes n1 or hypertension, Myotherapy treatment or Remedial Massage is mainly recommended.

Oct
Joint mobilisations are manual therapy techniques that improve joint mobility and flexibility and reduce joint pain. Joint mobilisation can be applied to many body joints. Some contraindications have to be taken into consideration for mobilisation: Joint swelling Osteo Arthritis Bone Fracture Bulge disk (if the mobs are intended on a vertebra) Mobilisation VS Adjustment. Mobilisations are different from Chiropractic adjustment. The difference is that Chiropractic adjustments are fast movements applied with more significant pressure. Mobilisations are constant slow, repetitive movements applied to the joint. Along with a Myotherapy treatment, Giovanni would evaluate if mobilisation is the proper treatment for your condition. For example, mobilisation along the spine is recommended when someone presents with a stiff back in the sacrum, lumbar, thoracic or lower cervical area. Giovanni would always double-check with you about what the mobs felt like. Types of Mobilisation. As we already know, the body is made of different types of joints. Given the different types of joints, like socket joints, plane joints and more, others are the type of mobilisation. For example: For a joint like the hip, we can apply mobility like a distraction, anterior-to-posterior pressure or posterior-to-anterior pull, internal rotation or superior-to-inferior pull. Some of these techniques can be applied to other joints, and each way of using a mobilisation aims to improve a specific range of motion. So, all up, the type of mobilisation that we have are: Superior to Inferior; Inferior to superior; Distraction; Posterior to Anterior; Anterior to Posterior; Posterior glide; Anterior glide; Lateral glide; Medial glide. Mobilisation Belt. A mobilisation belt can be used to deliver the mobilisation based on the joint we aim to work on. A belt is a tool wrapped around the designated joint we want to work on and is used to apply stretches that would not be as easy to achieve by hand. An example is a hip distraction. For distraction, we refer to it as a force that pulls a joint apart. In the case of a hip, the head of the femur is pulled away from the hip’s socket from the medial to the lateral direction. As you would imagine, using bare hands for applying this technique not only could result in an uncomfortable approach to the intimacy of the patient, but it would requireFr too much effort for the therapist, resulting in poor mobilisation delivery and risk of injury. Therefore, the best tool is a belt wrapped around the patient’s hip and the therapist’s waist. Why use the mobilisation technique? The mobilisation technique aims not to reproduce pain, cracking sound, or sharp sensation. Indeed, the aim is to reproduce a firm pressure/pull on the joint area. Regarding the thoracic area, if any of those vertebrae reproduce pain or sharp sensation, applying the mobs along the vertebrae/ribs joint would be better. Doing so would still possible to affect spine mobility indirectly. Giovanni’s training for this type of modality started during the Advance Diploma in Myotherapy at RMIT and continued at the Bachelor of Health Science at Torrens University. Mobilisations technique can be applied to Big Toe, Ankle, Shoulder, Feet, Hip, Wrist, Elbow, Vertebrae, SIJ joint, Facet Joint, Clavicle and other body areas. An example of joint mobilisation for the feet. Mobilisations at the ankle area are used for improving ankle mobility. Indeed, improving ankle mobility is to better support during the walk, standing and or running. Always talking about the feet area, the mobilisation applied to the Big Toes is used along the Metatasolphalangeal Joint. Do you feel your joints stiff? Your booking for a Myotherapy treatment with Giovanni is just a click away. This mobilisation is applied by creating a distraction movement within the joint, pulling the toes away and then using it for passive flexion and extension. As mentioned in another blog post about wearing bear foot shoes, the Big toes are meant to extend from 65° to 70°. Conclusion The Big Toes are the feet joint that should push the most in the feet strike as we walk. In conclusion, mobilisations are a great way to increase mobility within a joint allowing better movement and improving the range of motion.

Jul
Barefoot shoes are now becoming more and more popular. One of the main reasons why this is happening, I believe is the spreading idea that having the feet, seated in a tight box all day, is not so beneficial. So, what can be beneficial about going around barefoot? Or having barefoot shoes? Well, the foot is made up of 20 muscles, and 30 ligaments. That’s a lot for such a small body portion. Now, in order to have those muscles working and the ligaments playing their function, to hold the joint together and allow the joint stability to be efficient, both those 2 groups of body connective fibres have to be stimulated. So, that’s where the tight box fails. Having rigid shoes on all day, with or without a high heel, is not supportive, it is actually numbing the muscles. Said so, it is true that shoes can protect the feet from damage. In certain environments, shoes, especially rigid protective shoes are mandatory, like in the construction industry or in a factory. But even through that, we don’t spend all day at work, isn’t it? Are you saying that barefoot wearing is for everyone? No, I am not saying that. There are specific conditions, that may not allow you to wear barefoot shoes. But, if you are in doubt about what’s the right thing to do, I would get in touch with a podiatrist, and he specific if you are in Melbourne I would contact Andy. I did that myself. My journey actually started in 2018 when I was in Thailand studying with Pichest. He always points out students about their feet and wrinkled toes. He would refer to shoes and Sox as cages for feet. In Thailand, there is no need for shoes, as is really hot, he would be barefoot or use flip-flops all day. ( I then realise that not even flip flop is a solution, anyway). Said so, once I left Chiang Mai back then I did decide to start using sandals all year round. Even though I have to say that occasionally in winter, I did wear closed shoes. The years did pass by and I did notice my pinky toes were not changing shape after all these years compared to the other 4 toes. The pinky toes were still seating quite close to the 4th toes and would not go out straight. Simultaneously, my Instagram account did start to come up more frequently with posts of barefoot shoes and barefoot sandals. From there then, I did realise that wearing sandals with a narrow front was not going to make much of a difference. Also, the sandals I was wearing, were quite rigid anyway. So that would basically not make much difference for my foot, I found out later. How did I get to wear barefoot shoes? That’s when I went to see Andy, in Feb ’22. Andy is a really carrying and smiling man. I like his approach to the question I was asking and took a quiet pragmatic approach to my feet/body presentation. After several assessments on the spot, I was told that wearing barefoot was not going to be a problem. And actually, another thing that I was told was that my left foot, which is flat compared to the right was not a problem either. And that was the main reason I went to see Andy actually. To find out how I could fix that flat foot. And with my surprise, I was told that flat foot is there because the body compensates for structural scoliosis. So If I was going to change my left foot shape, probably I would create an issue then in my back or hip. In conclusion, since Feb 22 I start wearing barefoot shoes. I did opt for Vivo barefoot. So far, can’t complain. I can see my feet changing shape, and even when I go for hikes and long walks I have no foot pain or discomfort. I don’t see myself going back to wearing conventional shoes any soon. And since then I start recommending to my client too about barefoot wearing. I always suggest them having a chat with Andy or a podiatrist who can see the potential of barefoot wearing, and for those who took up the change, so far, haven’t heard any complaints but only good stories. Another way to dig more about barefoot wear is also visiting SoleMechainc, a shoe shop down in Hampton, where you can find a broad range of barefoot wear and fantastic client service. In conclusion, if you are foot is in pain, massage therapy would still help. But as often happen, massage therapy by itself is not enough, so exercise, and change habits.