I had been looking for a new space to relocate my Myotherapy Clinic, and when I found one in Coburg, I knew it was the right choice. As I started telling my client and friends about my relocation plan from Fitzroy North to Coburg, the question they ask is: “Why Coburg?” And the answer is actually quite simple. In many ways, it feels like coming home. A New Chapter, in a Familiar Place For who has been following me for a while, you may know that in the last couple of years my clinic, Melbourne Massage and Treatment, wsa based in Fitzroy North for the last couple of years. But my professional journey didn’t begin there. Long before opening the Fitzroy North clinic, I had already been practising in Coburg for 3 years. And I was practising at home. I came to know the area well, and over the years, I built relationships with many local clients and healthcare professionals. Returning to Coburg wasn’t about moving somewhere new; it was about returning to a community where I already felt connected, and where I still live, actually. More Space Means Better Care Another bigger reason behind the move was the opportunity to create a clinic that better reflects the way I like to work. Myotherapy isn’t about rushing people through appointments, and is more about yes, hands-on treatment, but exercises play a crucial role in your recovery journey, Whether you’re coming in with persistent neck pain, recovering from a sporting injury, managing lymphoedema, or seeking Manual Lymphatic Drainage, treatment works best when both practitioner and client have a calm, comfortable environment. The new clinic at 325A Moreland Road, Coburg, gives me exactly that. Indeed, there is a dedicated waiting room as soon as you walk in. From there, you can access the studio, which is presented with a dedicated fitness class space, and again, a third space, which is only for massage. This all set up, gives me the opportunity to keep expanding the quality treatment for Melbourne Massage and Treatment while maintaining the one-on-one care that has always been at the centre of my practice. Easier to Reach Another advantage of the Coburg location is accessibility. Many of my clients travel from the surrounding suburbs, including: Pascoe Vale Brunswick Preston Reservoir Fawkner Thornbury Essendon Kew Fawkner Being located on Moreland Road makes the clinic easy to reach, regardless of whether you’re driving or using public transport. In fact, parking is straightforward, with unlimited parking on Haig Ave, the side street of the clinic. At the old location in Fitzroy North, I know, parking was a bit of a challenge. After all, arriving stressed because you’ve spent twenty minutes looking for a parking spot isn’t the ideal way to start a treatment session. And if you don’t drive, and you want to opt for public transport, you can easily reach the clinic via tram, bus or train. The trams that stop close by are 6,19 and 58, and the train stop close by is Moreland Station. The bus 510 stops right in front of the clinic. Staying Close to Melbourne’s Northern Community Throughout my career, I’ve enjoyed working with people from all walks of life; indeed, I learned many treatment techniques, which would give me the opportunity to get to know more people and more conditions. Among those presentations, we find: Office workers dealing with chronic neck and shoulder pain Athletes wanting to improve recovery People living with lymphoedema who need ongoing management Clients recovering from surgery People simply want to move more comfortably again Coburg sits right in the heart of Melbourne’s northern suburbs, making it an ideal location to continue supporting this diverse community. More Than Just a Change of Address Again, this relocation is not just about changing the clinic’s postcode. It was about creating a space that allows Melbourne Massage and Treatment to continue growing while staying true to the philosophy I’ve always believed in: “Step by step – Move More, Live Well”. I don’t believe treatment should be rushed, and if you know me, you know that well. I don’t believe every client fits into the same treatment plan; indeed, everyone needs a different level of care and attention to detail for their best performance and well-being. Lastly, I don’t believe pain should simply be masked without understanding why it’s there; therefore, I always share with my client my clinical reasoning and the “why” I take a certain approach to their presentation. How is all of this implemented in my Myotherapy Coburg Clinic? Well, the answer is easy: every appointment starts with listening to your concern. Only then do we decide together on the most appropriate treatment approach, because the treatment that works best for you, may differ from the one that works best for someone else. Looking Forward This move represents an exciting new chapter for Melbourne Massage and Treatment. I’m grateful to every client who has supported the clinic over the years, whether you’ve been seeing me since my earlier days in Coburg, joined me in Fitzroy North, or are discovering the clinic for the very first time. If you’re looking for a Myotherapist in Coburg, or you’re seeking treatment for lymphoedema, Manual Lymphatic Drainage, remedial massage or musculoskeletal pain, I’d be delighted to welcome you to the new clinic. I look forward to helping you move better, feel better, and get back to doing the things that matter most. FAQ – Myotherapy and Lymphoedema Clinic Coburg
Category Archives: Blog

Blog
Why I Chose Coburg for My Myotherapy Clinic
I had been looking for a new space to relocate my Myotherapy Clinic, and when [...]
Continue readingJul
Blog
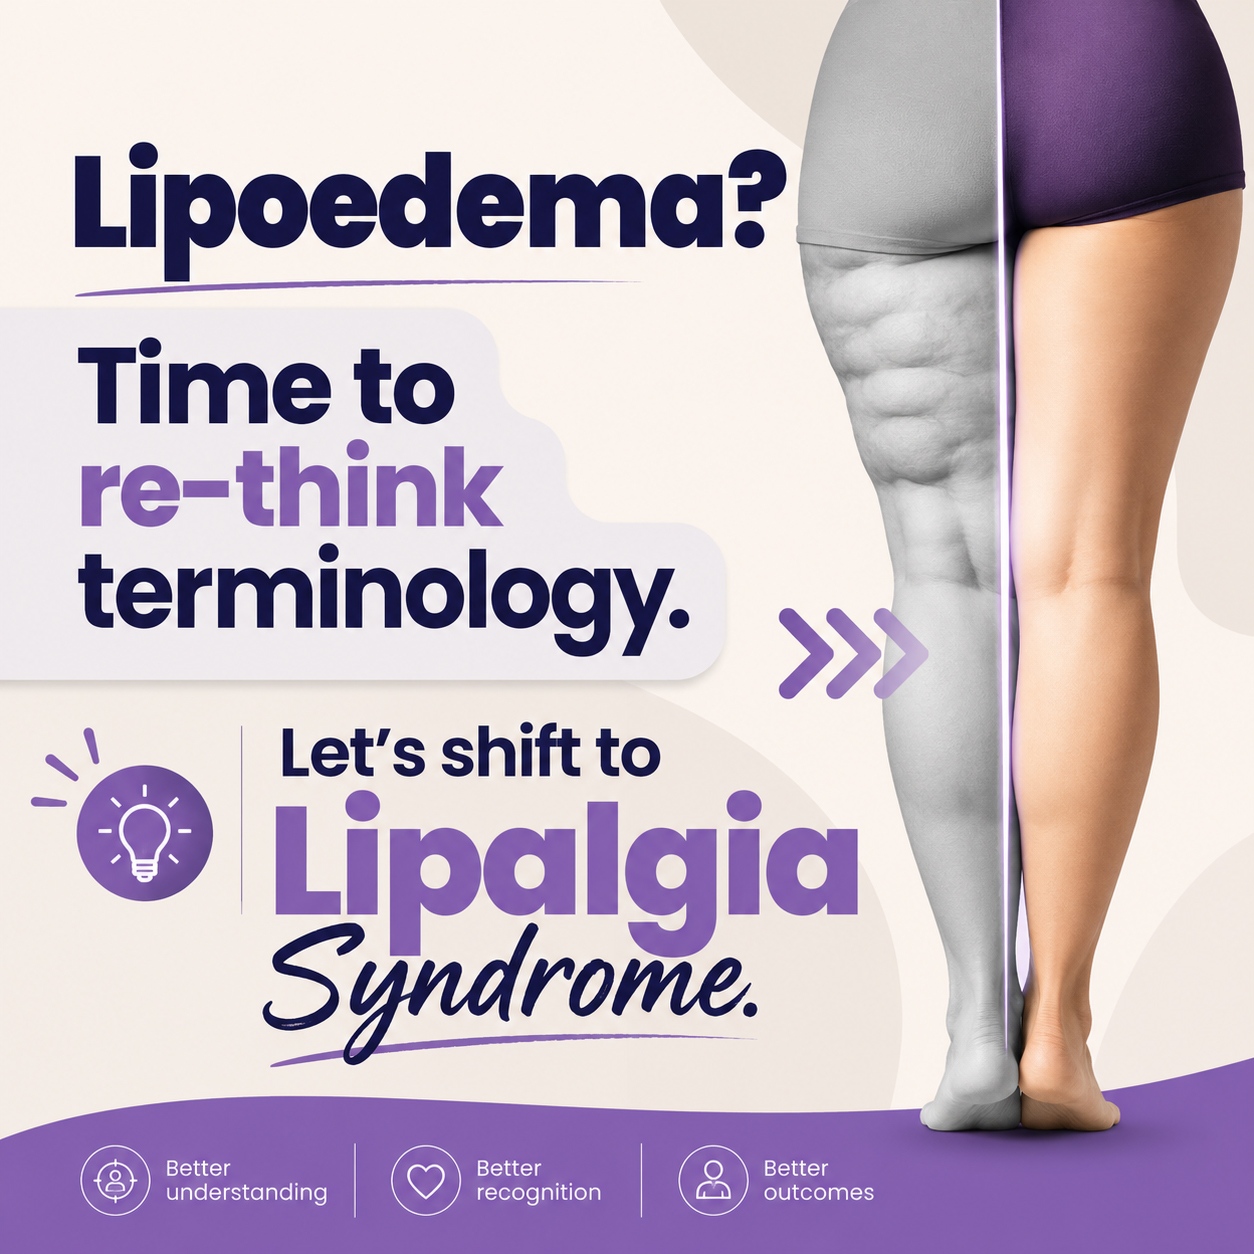
Lipalgia Syndrome or Lipoedema? Why the Name Matters
Lipalgia Syndrome is a name for a condition that most often, and more commonly, we [...]
Continue readingJul
Blog
Melbourne Massage and Treatment Is Returning to Coburg in July 2026
After two wonderful years in Fitzroy North, I am now ready to announce that Melbourne [...]
Continue readingBlog
When You Should Stop Running? And For How Long?
Here at Melbourne Massage and Treatment, Myotherapy Clinic in Coburg, when treating patients who love [...]
Continue reading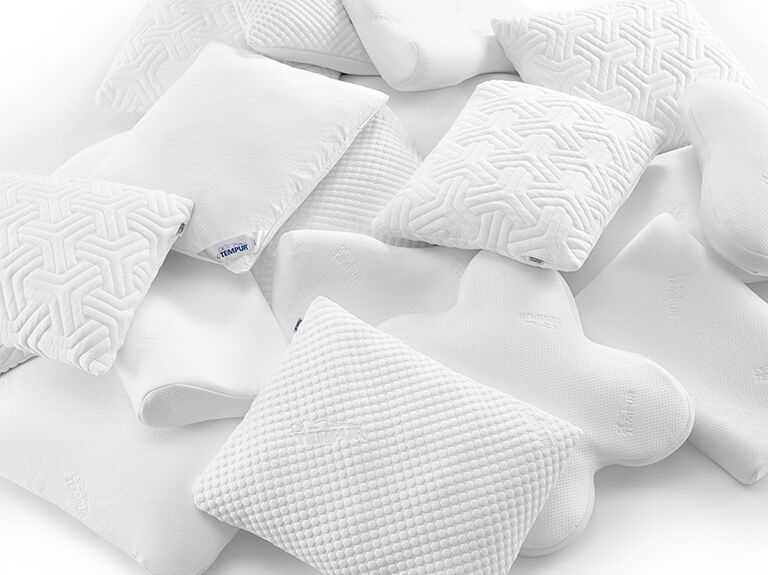
Blog
Pillow For Neck Pain: What You Need To Know
When treating someone for neck pain, a common question I get asked is: “Should I [...]
Continue readingJun
Jul
Lipalgia Syndrome is a name for a condition that most often, and more commonly, we all call Lipoedema. But why so? And why Lipalgia Syndrome would be more accurate than Lipoedema? My name is Giovanni, and I am a Myotherapy and Lymphoedema therapist who runs Melbourne Massage and Treatment in Coburg. Here at my clinic, I get to work often with clients who have been diagnosed with Lipoedema or clients who are suspicious of having Lipoedema. That said, it can happen that the client themself, are confusing one condition (Lipaglia Syndrome or Lipoedema) for something else, and that’s also because they see oedema in their limb, and associate that with having Lipoedema. But we now know that oedema is not a symptom of Lipoedema unless we are looking at Lipo-Lymphoedema, a really advanced stage of the syndrome, which is not as common as we think. Let’s break down the names: Lipoedema and Lipalgia Syndrome The term Lipoedema combines the Greek word lipo (fat) with oedema (swelling). Unfortunately, as mentioned above, this terminology can be misleading. This happens because by reading the name, we think we have to see an oedema in this presentation, where an oedema, actually, should not be. Because an oedema is caused by a dysfunctional lymphatic system, which is not what we look at when talking about Lipoedema. In fact, Lipoedema is actually a chronic, painful disorder of abnormal adipose (fat) tissue. This is why an increasing number of clinicians have suggested that the condition would be more accurately described as Lipalgia Syndrome, meaning Lip (fat) algia (pain), therefore, painful fat. Then, all this said, to clarify what’s going on with the lymphatic system, there are several investigations that look into the exact role of the lymphatic system in lipoedema, and by now, it is well established that lipoedema is a different condition from lymphoedema. This is because the lymphatic system is generally intact in the early and moderate stages of lipoedema, although secondary lymphatic overload can develop in advanced disease, leading to lipolymphoedema. This distinction is important because the diagnosis, because the treatment approach is different for lipoedema than for lipolymphoedema. Pain Is the Hallmark Symptom for Lipalgia Syndrome One symptom that can be used to mark the difference between Lipalgia Syndrome (or Lipoedema) and other conditions is pain. Patients commonly describe their legs, hips, buttocks or arms as: aching heavy tender to touch painful even with light pressure bruising easily feeling constantly sore without a clear injury In fact, unlike obesity, where enlarged fat tissue is usually painless, Lipalgia presents with diffuse, persistent pain throughout the affected tissues. If someone presents with some of the above symptoms and with a body that mimics the look of Lipoedema, but they don’t experience any pain, well, they don’t have Lipoedema. And again, that’s why we should call it Lipalgia Syndrome, because what we have to look for, is not oedema, but pain, as main symptom. That said, this pain often limits exercise tolerance and significantly affects quality of life. Current research consistently identifies pain as one of the defining characteristics that separate lipoedema from obesity and many other fat disorders. Therefore, from a clinical perspective, this symptom (pain) is essential to diagnose someone with Lipalgia Syndrome (Lipoedema). On the other hand, if a patient presents with enlarged legs or arms without pain, it is worth carefully considering whether the diagnosis is truly Lipalgia Syndrome (Lipoedema). Other conditions may be more likely, including: obesity with disproportionate fat distribution lipohypertrophy lymphoedema chronic venous disorders mixed presentations involving more than one condition Therefore, don’t try to self-diagnose with social media or a simple Google or AI search, as the reality of facts is way more complicated. Why the Name “Lipalgia” Makes More Sense The use and understanding of language influence how diseases are understood. In fact, the word lipoedema understandably directs attention towards swelling and fluid accumulation, when in fact the most disabling symptom for many patients is pain. That’s where the term Lipalgia shifts the focus towards what patients actually experience every day: chronic painful adipose tissue tenderness heaviness impaired movement reduced quality of life Although Lipalgia has not yet become the internationally accepted medical terminology, many clinicians believe it better reflects the clinical presentation and may help reduce confusion with lymphoedema. What Is Lipohypertrophy? One of the conditions that is often mistaken for Lipoedema is Lipohypertrophy, because both conditions involve a symmetrical increase in subcutaneous fat, particularly in the legs and sometimes the arms. The key difference is that Lipohypertrophy is generally not painful. So yes, those conditions are really similar, and the people with lipohypertrophy usually have enlarged limbs but do not experience the diffuse tenderness, aching, easy bruising and persistent discomfort that characterise Lipalgia. For this reason, recognising the presence or absence of pain is one of the most valuable aspects of the clinical assessment. And again, an accurate diagnosis is important because management strategies differ depending on the underlying condition. Assessment at Melbourne Massage and Treatment At Melbourne Massage and Treatment in Coburg, I provide comprehensive assessments (not diagnoses) for people experiencing leg or arm enlargement, chronic pain, lymphatic conditions and soft tissue disorders. What I refer to as assessment, and not diagnosis, is the fact that I don’t have the clinical possibility to diagnose anyone with anything, but I can point you in the direction of further investigations to get to understand what is happening to your body. Further investigation can involve talking to your GP about specific tests or referral to a specialist, who can assist you in understanding what your body is going through. Every assessment aims to distinguish between conditions such as Lipalgia (Lipoedema), Lipohypertrophy, obesity-related fat accumulation and lymphoedema so that treatment can be tailored to your individual presentation. Early recognition, education and appropriate management can significantly improve comfort, mobility and long-term outcomes. On my end, I can still offer MLD to overcome pain and where present oedema, and Fitness Class to help you and your body get stronger […]
After two wonderful years in Fitzroy North, I am now ready to announce that Melbourne Massage and Treatment is officially relocating back to Coburg from 1 July 2026. This move marks an exciting new chapter for my clinic, moving into a larger, dedicated treatment space at: 325A Moreland Road, Coburg, 3058, VIC The new location gives Melbourne Massage and Treatment, Myotherapy and Lymphoedema clinic, the opportunity to grow independently in a space designed specifically for client care, wellbeing, and long-term community connection. A New Space In Coburg for Your Well-Being While Fitzroy North has been an important part of my clinic’s journey, the move back to Coburg comes with exciting opportunities. To start with, the location is a shop-front, and so it provides more visibility. There are still plenty of options to reach the clinic via public transport, and greater potential for the clinic to continue growing. Having a standalone clinic also means clients will now be visiting a dedicated wellness space rather than a room inside a GP clinic. This allows for a calmer and more personalised treatment environment focused entirely on massage, myotherapy, recovery, and movement. At this stage, Melbourne Massage and Treatment will continue operating as a single-practitioner clinic, yes, still only me, but ensuring the same personalised care and attention clients have always received. And you are a Melbourne Massage and Treatment client, you know the effort I put in my work. Thank You to the Fitzroy North Community The support from the Fitzroy North community over the past two years has been genuinely appreciated. Every returning client, referral, conversation, and recommendation has helped Melbourne Massage and Treatment grow. Although relocating back to Coburg was ultimately the right decision for the clinic’s future, the connection with the Fitzroy North community will always remain an important part of the business journey. And luckily, the distance between the old and new locations is only a few minutes by car, or a short public transport journey. Services Available at the New Coburg Clinic All current services will continue to be offered at the new Coburg location, including: Clinical Myotherapy Remedial Massage Fitness Classes Manual Lymphatic Drainage (MLD) Lymphoedema Management Lipoedema Management Thai Massage Thai Yoga Importantly, there will be no price increases to any services following the relocation. Clinic Opening Hours In the new location in Coburg, Melbourne Massage and Treatment will maintain the regular operating hours: Monday to Friday: 9:00 am – 7:00 pm Saturday: 10:00 am – 7:00 pm As I currently work by myself, bookings are highly recommended. However, walk-ins are still welcome whenever availability allows. Clients can check live availability through the online booking system. Parking and Public Transport Now, of course, how can you get there? Well, getting to the new clinic is simple, whether driving or using public transport. Parking 1-hour parking is available directly in front of the clinic: Monday to Friday: 8:00 am – 6:00 pm Saturday: 8:00 am – 4:00 pm There is also plenty of unrestricted parking available on Haig Avenue, located directly next to the clinic. Public Transport Options The clinic is well connected by bus, tram, and train services: Bus 510 – Shamrock St/Moreland Rd stop directly in front of the clinic Tram 19 – Stop 28 (Moreland Rd/Sydney Rd), approximately 10 minutes’ walk Tram 6 – Stop 133 (Moreland Station/Moreland Rd), approximately 10 minutes’ walk Tram 58 – Stop 40 (Moreland Rd/Melville Rd), approximately 11 minutes’ walk Moreland Station – Approximately 10 minutes’ walk Accessibility Information The new clinic space in Coburg is larger and more comfortable; however, please note that the premises currently do not have disabled toilet access. Clients with accessibility concerns are encouraged to get in touch before attending so arrangements and suitability can be discussed. Looking Ahead Returning to Coburg feels like coming home for Melbourne Massage and Treatment. The move represents a fresh start, greater independence, and an opportunity to continue building a trusted local clinic focused on high-quality treatment and personalised care. From clinical myotherapy and remedial massage to lymphatic care and Thai massage, Melbourne Massage and Treatment looks forward to welcoming both returning and new clients to the new Coburg location from 1 July 2026. FAQ
Here at Melbourne Massage and Treatment, Myotherapy Clinic in Coburg, when treating patients who love running, I am often asked this question: “Do I need to stop running because of my knee pain?” Whether you’re training for an event, running recreationally along the Merry Creek, or simply trying to stay active, knee pain can be frustrating and concerning. But let’s start with some good news: in most cases, stopping running forever is not the answer, and is not something to ever consider. As a Myotherapist who is treating runners and active individuals in Coburg and Melbourne’s inner north, I rarely recommend that someone give up running permanently. What I would personally suggest, on the other hand, is that for a short period of time, if needed, you may need to reduce the running load. Specifically in the acute or subacute stages of recovery. However, that’s very different from being told you’ll never run again. Therefore, what I offer as a Myotherapist is to help you understand why the knee pain developed in the first place and create a plan to return to running safely and confidently. Knee Pain Doesn’t Always Mean You Need to Stop Running Many people assume that knee pain automatically means there is damage occurring inside the joint. But we now know that when we look at pain, the reality is often more complex. So, let’s try to simplify why knee pain can be a thing. Knee pain can develop when the tissues around the knee are asked to tolerate more load than they are currently able to handle. Here are a few examples: A sudden increase in running volume Returning to running too quickly after time off Weakness in the legs Poor recovery habits Reduced mobility through the hips or ankles Changes in training intensity At our Coburg myotherapy clinic, we regularly assess runners experiencing knee pain and often find that the issue extends beyond the knee itself. The Knee Is Part of a Bigger System The knee joint sits between the hip and ankle, meaning both joints have a significant influence on how the knee functions during running. Following the understanding of the mobility and stability joints, we then need to look at the leg mechanics before assuming the only issue is at the knee. Therefore, when I assess a runner with knee pain, I look at the entire movement chain, including: Hip mobility and strength Pelvic stability Ankle mobility Foot mechanics Running technique Training load Recovery strategies Addressing these factors is often the key to reducing symptoms and improving long-term knee health. Improving Ankle and Hip Mobility to Stop Knee Pain Mobility plays an important role in running performance and injury prevention. Indeed, when mobility is lacking, a stable joint that follows in the chain would try to act as a mobile joint. Obviously, this is not a fun thing. Ankle Mobility Limited ankle movement, especially dorsiflexion, can increase stress through the knee during running, particularly when climbing hills, accelerating, or changing direction. This can happen because if your ankle lacks movement in dorsiflexion, the knee may compensate by dropping medially. So, improving ankle mobility may help distribute forces more effectively throughout the lower limb. Hip Mobility Tight hip flexors and reduced hip rotation can affect running mechanics and increase the workload placed on the knee. Regular mobility exercises can help improve movement quality and reduce unnecessary strain. As part of our running injury treatment approach in Coburg, mobility assessments are often a key component of rehabilitation. Big Toe Yes, you did read that, your big toe. Big Toe is another mobile joint, and it is big because it sits in the middle of the body, and when walking, running or sprinting, it is the primary body mover. Indeed, for walking, the big toe is better to passively flex up to 45°, running 65°, sprinting 85°. Stability Helps Protect the Knee Once mobility is sorted out, or it may not even be the background issue, it is time to look at stability. For stability, we refer to the body’s needs and ability to control movement under load. Many runners with knee pain demonstrate reduced stability in the hips and pelvis, which can increase stress on the knee. To improve the stability, we look into exercises like: Quads focus exercises – Knee extension on the bench Hamstring focus exercises – Knee flexion on bench Step-downs Split squats Single-leg deadlifts Glute strengthening exercises – specific glute medius Improving stability can enhance running efficiency while reducing unnecessary strain on the knee joint. Strength Training for Better Knee Health As the knee is a stable joint, one of the most effective ways to support healthy knees is through targeted strength training. At Melbourne Massage and Treatment, we often discuss strength as the foundation of long-term injury prevention. Quadriceps Strength The quadriceps help absorb force during running and are essential for controlling knee movement. Exercises such as knee extension, wall sit to start with and then high bar squats, step-ups, lunges, and leg press variations can improve lower limb resilience. Hamstring Strength Strong hamstrings contribute to overall knee stability, as part of the body posterior chain muscle group, and help manage forces during the running cycle. Exercises may include: Romanian deadlifts Hamstring curls Single-leg deadlifts Nordic hamstring exercises Calf Strength The calves absorb significant loads during running, yet they are often neglected. And again, from the posterior muscle chain group are ideal muscles for knee stability, as they support the knee from the distal porion to the proximal area. Exercises ideal for your calves are: Single-leg calf raises, bent-knee calf raises (extra focus on the soleus muscle), and progressive plyometric exercises can all be beneficial. Managing Running Load Is Essential Another cause of knee pain while running is dictated by the running load. In fact, sometimes the issue is simply doing too much too soon, or increasing the load too fast, without allowing the tissue to adapt to the new load. Here is a short summary of what […]
Jun
When treating someone for neck pain, a common question I get asked is: “Should I change my pillow?” or “I slept badly, my pillow is not good”. In fact, there is a common belief that a pillow or a bad night’s sleep is the cause of constant neck pain. While pillow comfort matters, clinical experience in myotherapy in Melbourne shows that pillows are rarely the root cause of ongoing neck pain. At a clinical level, neck pain is usually driven by: movement dysfunction poor spinal cervical stability previous injury history and reduced muscular control Therefore, a good pillow can support symptoms, but it does not fix the underlying issues that drive your pain. Coburg Myotherapy Insight: What Actually Causes Neck Pain? At Melbourne Massage and Treatment, a myotherapy clinic in Coburg, I consistently see neck pain linked to five key factors. 1. Spine Mobility and Stability Dysfunction The neck’s vertebrae are part of a full kinetic chain involving the thoracic spine, shoulders, and rib cage. Under this aspect, indeed, we should look into the lack of thoracic mobility which may cause the stable portion of your cervical (C3-C7) to seek that mobility capacity. But as we well know, a stable joint can’t act as a mobile, and vice versa. In more detail, poor spinal mechanics lead to: muscle overload in the neck joint irritation tension during rest and sleep And about the pillow, it is an object that cannot restore spinal movement or control. Isn’t it? 2. Whiplash History and Incomplete Rehabilitation Other patients with chronic neck pain may have a history of whiplash that was never fully rehabilitated. Indeed, a whiplash accident, as a result of a car crash or even during a contact sport incident, can lead to chronic neck pain, especially if not rehabilitated correctly. This happens because during a whiplash, the cervical joints get put under extreme force and can lead to a torn ligament or laxation. However, without structured rehab, long-term changes in: deep neck flexor control proprioception postural endurance can persist for years, or even show up after years of post-injury. So again, no pillow can change these symptoms or help you recover from such an injury. 3. TMJ Dysfunction and Jaw Tension Temporomandibular joint (TMJ) dysfunction is another underlying cause of neck pain. By following the kinetic joint chain we discussed earlier, we see that the TMJ is the next joint in the chain, after the cervical one. Therefore, Jaw clenching and TMJ irritation can: increase suboccipital muscle tension contribute to forward head posture amplify cervical joint stress That’s where you may wake up with more neck pain than during the daytime. The clantching can be heavily responsible for that. This is why neck pain is often worse under stress or during sleep. 4. Hypermobility and Joint Instability Following the concept of a torn ligament, as per a whiplash incidence, joint hypermobility is clearly another underlying issue for neck pain. This happens because there is a lack of stability and control in those cervical ligaments. This leads to: reliance on passive ligament support early muscle fatigue poor tolerance of sustained sleeping positions A “supportive pillow” alone may not solve instability and can sometimes reinforce dependency on external support rather than active control. 5. Neck Strength and Motor Control (8–12 Week Rehab Window) In my experience, this is the big issue. Most people don’t even think about the strength of their neck or upper shoulder muscles, and this is where things can go really wrong. Indeed, one of the most effective long-term treatments for neck pain is a structured strengthening program that targets: deep cervical flexors scapular stabilisers postural endurance muscles As per many exercise programs that intend to strengthen the body structure, we look at 8–12 weeks of progressive exercise-based rehabilitation. This is why many patients searching for neck pain treatment in Melbourne benefit more from rehab than passive support strategies. What the Research Says About Pillows and Neck Pain To support with evidence, why a pillow is not going to change in the long term, your neck pain, we can look at a systematic review from Pang J. et al. (2021), which found: Some pillow designs may reduce symptoms But long-term structural or functional improvements are limited and inconsistent Therefore, pillows may improve comfort, but they do not fix the underlying cause of neck pain. And yes, the pillow consistency can make a difference, but, again, it does not fix the neck pain, nor would it cause neck pain. Melbourne Myotherapy Approach: What Actually Works At Melbourne Massage and Treatment – Myotherapy Clinic in Coburg, I focus on evidence-based management of neck pain. Indeed, my approach to a client who presents with neck pain is structured as follows: Detailed analysis of clinical history – including previous history of injury and past/current sport activities Clinical assessment – active and passive range of motion, and neurological test where/when needed Outline your short-term and long-term treatment – what you want to achieve in today’s session and in the upcoming weeks/months, and what you are ready to do about it (exercise-wise) Treatment plan outline – what I believe could be a tailored treatment plan given the results of the above findings, including your short/long-term goals In all of these, Remedial Massage plays a crucial initial role to relax the nervous system, reduce initial pain and discomfort, promote healing and movement, but even techniques like mobilisation are ideal for treating neck pain and improving the initial outcome. But again, hands-on treatment is only the first step of the journey, and along with other myotherapy sessions that follow the initial consultation, exercises have to be the main focus. Exercises for the neck, for the shoulders and for your back. In summary, here is a dot point list of what a treatment plan aims for: cervical + thoracic mobility restoration deep neck flexor strengthening scapular control TMJ and jaw tension management (if needed) graded load tolerance programs These interventions address the true drivers of pain rather than just […]

Jun
Hip pain can be frustrating, and not all hip pains are the same. I personally experienced Femoroacetabular Impingement (FAI) pain myself, and it is not fun. Indeed, this type of pain can stop you from training, affect your sleep, make sitting uncomfortable, and eventually impact your quality of life. Over the years, I’ve seen many active people spend months treating the symptoms without understanding the actual cause. If you’re experiencing groin pain, hip stiffness, pinching during squats, or discomfort after prolonged sitting, FAI may be worth investigating. What Is Femoroacetabular Impingement? In simple terms, Femoroacetabular Impingement (FAI) occurs when there is abnormal contact between the femoral head (the ball) and the acetabulum (the socket) of the hip joint. As with any tissue that gets overstimulated, this can result in irritation and inflammation, leading to damage to the labrum, cartilage, and surrounding tissues over time. In some cases, if left unmanaged, it may contribute to the development of early hip osteoarthritis. The symptoms that most people come up with when experiencing FAI are: Deep groin pain Hip stiffness Clicking Catching Locking sensations Pain when sitting for extended periods. Those symptoms are typically aggravated by activities involving Deep hip flexion Squatting Running Kicking Cycling Getting in and out of a car. The Different Types of FAI As we have already seen in the antirotated and retroverted hip presentations, we are all different, and even a Femoroacetabular Impingement can present differently. Let’s have a look at the different types of Femoroacetabular Impingement. Cam Impingement Cam impingement occurs when the femoral head is not perfectly round. During hip movement, particularly flexion and internal rotation, the abnormal shape creates increased pressure against the edge of the socket. This is the most common form seen in young athletic populations. Pincer Impingement Pincer impingement occurs when the acetabulum provides excessive coverage over the femoral head. The socket effectively “overhangs,” increasing the likelihood of compression during movement. Mixed Impingement Mixed FAI is the most common presentation clinically. In this situation, both cam and pincer characteristics are present simultaneously, resulting in a combination of abnormal contact from both the femur and the acetabulum. Who Is More Likely to Develop FAI? The common ground for an FAI presentation includes young and middle-aged active individuals. A higher prevalence is seen among athletes participating in sports that involve: Repetitive hip loading during adolescence Football Hockey Soccer Martial arts Dance Running. This evidence shows that sports activities play a crucial role in FAI presentation, but it is also important to consider that genetic factors could be involved. On the other hand, as per any physical structural presentation, not all the people who present with a FAI may experience pain. Many people have structural changes visible on imaging but remain completely symptom-free. Is a Scan Worth It? This is one of the most common questions I get asked when someone presents with some sort of ongoing pain or even acute discomfort. My answer is usually: it depends on your symptoms and how long they have been lingering around. Why I don’t recommend a scan as a first thing to go for (unless I am suspicious of something that I can’t treat directly) is because a scan may find an abnormality in the body, but that doesn’t mean that what we see is actually the source of the pain. In fact, many people may have a FAI presentation and have no symptoms at all. Therefore, a scan alone should never determine treatment decisions. Sp, a diagnosis of FAI should combine: Clinical history Physical examination Symptom presentation Imaging findings So yes, a scan should support the diagnosis, not create it, or it would be really chaotic to define why someone is experiencing pain, and create a treatment plan for it. If You Need Imaging, Which Scan Is Best? Step 1: X-Ray For most people, a standard pelvic and hip X-ray is the first and most appropriate imaging investigation. X-rays are excellent for identifying the bony shapes associated with cam and pincer impingement and are considered the primary imaging modality in the assessment of FAI. The downside of X-rays is that they involve radiation, so if possible, avoid them. Step 2: MRI If symptoms are there for a prolonged period of time, and exercise therapy is failing to restore functionality, an MRI becomes extremely valuable. MRI can assess: Labral tears Cartilage damage Joint degeneration Other soft tissue causes of hip pain Many hip specialists consider MRI the cornerstone investigation when assessing intra-articular damage associated with FAI, given the high definition of the image and results. Step 3: CT Scan CT scanning is generally reserved for surgical planning or when a very detailed understanding of the hip’s bony anatomy is required. CT provides excellent visualisation of bone structure, but it is not usually necessary as an initial investigation. So, When Should You Get a Scan? In my clinical opinion, based on current evidence, imaging becomes worthwhile when: Hip or groin pain has persisted for more than 6–12 weeks Symptoms continue despite appropriate rehabilitation The range of motion is progressively decreasing Mechanical symptoms such as catching, locking or giving way are present, and are painful Surgery is being considered The diagnosis remains unclear after clinical assessment If your symptoms are mild and improving with treatment and exercise, I would not bother to get an image taken. Exercises are a great way to maintain hip pain-free and keep your body going. Exercise Protocol for FAI This is where we need to put some focus: Exercises! So, first things first, when someone presents with a FAI, we want to take away or modify the habit that we can, in order to reduce discomfort and hip pain. An example could be removing squat from an exercise program or reducing the time spent in a seated position. Next, we would start looking into your mobility capacity at the ankle level, especially if you are someone who runs as part of a sports activity. And all of this is part of a protocol […]

Jun
“Oh, I can’t squat that deep, ” is what I sometimes get told by my clients when I train them for exercises. What do I think about it? I think they are right, maybe they can’t, and that’s ok. And why can’t they? Well, we are all different, and not one squat is equal to the other one. And possibly the answer is behind the fact that they may have a femoral anteversion. Indeed, femoral anteversion can affect how your hips rotate, how your feet naturally position themselves during a squat, and even how comfortable certain exercises feel. We Are Not Built the Same. And That’s Fine! Most recently, I was working with a client who presented with Lipoedema and, consequently, hypermobility, and when we got to work on her squat we notice that deep squat for her was not a thing (even thought she is hypermobile). Her PT, on the other hand, was asking her to just keep trying, gave her an app-video to train with, and told her that the squat had one way to be. Obviously this is not the case. We all squat differently, and there is nothign wrong with it. Than, after a short investigation, we realise that she can go deeper in the squat, if she use few tricks and tips. This is because her hips are antroverted. Moving forward from this single case scenario, we also have to remember that our movement is influenced by: Muscle strength Mobility Motor control Previous injuries – (actually, she also had severely injured her L ankle when she was a teen, and her dorsiflexion is compromised on that side) Joint structure Bone morphology The last point is often overlooked. In fact, the shape and orientation of the femur can significantly influence how the hip moves. This is where femoral anteversion and its counterpart, femoral retroversion, become important. Therefore, understanding these anatomical differences can help explain why you squat comfortably with feet narrow, standing and facing forward, while another naturally prefers a wider stance with their toes turned outward. What Is Femoral Anteversion? Femoral anteversion refers to the forward orientation of the femoral neck relative to the shaft of the femur. More simply, this means that the head and neck of the thigh bone are rotated more anteriorly than the norm. In fact, everyone is born with some degree of femoral anteversion. What can happen is that during growth and development, the amount gradually decreases, but the final angle varies considerably between individuals. Research by Scorletti M et al. (2020) has shown that femoral versions are present on a spectrum, where there is significant variation even among healthy adults. That’s where the word “normal” has no application. There is no “normal hip”. What indeed is normal is the variability of human anatomy. Regarding the characteristics of people with greater femoral anteversion, typically, we find: Increased hip internal rotation Reduced hip external rotation A tendency toward a more forward-facing foot position Greater comfort in certain squat positions Different movement strategies compared to those with retroverted hips And therefore, let’s underline the fact that femoral anteversion is not a pathology, but it is simply an anatomical variation. What Is Femoral Retroversion? Now that we have looked at femoral anteversion, it is time to look at the opposite presentation. In this case, the Femoral retroversion occurs when the femoral neck is oriented more posteriorly relative to the femoral shaft. These individuals often display: Increased hip external rotation Reduced hip internal rotation A natural toe-out posture Preference for wider squat stances Reduced comfort with feet pointing straight ahead None of those presentations is better than the other one, or more “normal”. They are simply different anatomical variations of the hip biomechanics. The results of one or the other one are that based on the presentation you show up with, there are going to be certain movements that for you are easier or less easy. The real issue stands when people attempt to force a movement pattern that doesn’t match their anatomy, especially if they told: “this is how you squat/move”. How Femoral Anteversion Influences Your Squat Now that we have a better idea of what is what, in terms of hip anatomy variation, we can look at how femoral anteversion affects your squatting. As the hips flex during a squat, the femoral neck moves within the acetabulum (hip socket). The available space for movement depends partly on the shape and orientation of the bones involved. Remember, the femoral hip joint is a socket/ball joint, so a sphere shape (femoral head) rolling inside a concave socket. So, if you are one of the individuals who present with greater femoral anteversion, you will find it more comfortable doing movements where: Feet are relatively straight Your stance is narrow to moderate Knees track naturally over the feet Don’t need an excessive toe-out stand Indeed, by contrast, individuals with femoral retroversion often prefer: A wider stance Greater foot turnout More externally rotated hip positions And again, this is why two healthy people can perform completely different-looking squats and both be moving optimally for their anatomy. Trying to force everybody into the same squat position ignores the reality of individual biomechanics and would put one or another individual in a place of lack of confidence or body negativity. Why Foot Position Matters So, now that we see both anteversion and retroversion hip presentation, it’s time to understand why the feet position can make a difference when doing a squat, and where it is needed for a deeper squat and where it is optional. Indeed, as mentioned above, for someone with a retroverted hip, having feet straight and worst, even if too close to each other, and delivering a squat, is not a thing. This is dictated by the fact that the foot direction, such as straight or laterally directed, is given by the rotation that we apply at the hip joint. A person with significant femoral anteversion may naturally feel strongest with minimal toe-out, whereas someone with retroversion […]

May
As a therapist who offers Manual Lymphatic Drainage in Melbourne, I am blown away by how many people come and seek MLD for general wellbeing, and ask me questions like: “What about tapping my body?” “Should I do guasha?” “I have been told my Lymphatic System is sluggish” Indeed, if you’ve spent any time on social media lately, you’ve probably seen endless content about the lymphatic system, and of course, the more time you spend watching them, the more you will be offered. Dry brushing. Guasha. Detox teas. Essential oils. I call those “Social Media, Lymphatic hacks.” They belong only to social media, not to reality and/or science. As someone who practises Manual Lymphatic Drainage in Melbourne (MLD), I think it’s important to explain what the lymphatic system actually does, what MLD is really useful for, and why people often overcomplicate something that the body already does naturally. And honestly, for many healthy people, one of the best things you can do for your lymphatic system is simply go for a walk. What Is the Lymphatic System? To start with, the lymphatic system is part of your body’s immune and fluid regulation system. Its job is to: Help manage fluid balance Support immune function Transport waste products Assist with inflammation and healing It consists of: Lymph vessels Lymph nodes Lymphatic organs Lymph fluid Unlike the blood circulation, the lymphatic system does not have a pump like the heart, and another difference is that the lymphatic system is capable of absorbing substances that are, molecularly speaking, bigger than what the blood stream can do, simply because the capillaries of the lymphatic system have a bigger aperture than those of the blood stream. Then, regarding how the lymphatic system pumps fluid around the body, it is based on the fact that the internal vessel contraction occurs. The more the vessel contracts, the more liquid moves. And those vessels are sensitive to their surroundings, in fact: Muscle contractions Breathing Changes in pressure Everyday movement Those are all factors that stimulate the lymphatic system to work faster. That’s why movement is so important. And consider that in the human Lymphatic System, contraction rates are typically around 1 to 2 times per minute, at rest, where when doing intense visceral activity, it can jump up to 15 contractions per minute. Why Walking Helps Your Lymphatic System Now, we can than easily understand that every time we walk, our muscles gently contract and relax, and specifically, the calf muscles are the ones that work the most, and are the ones responsible for assisting both the lymphatic and blood systems to push liquid upwards, against gravity. So, walking acts like a natural pump for lymphatic flow, and it can help with: Encourage fluid movement Support circulation Reduce stiffness Improve breathing mechanics Support general recovery and wellbeing Reduce stress Your body evolved to move lymph through normal human movement. Not through expensive “detox” products. Not through aggressive scraping tools. Not through viral wellness trends. Simple movement works remarkably well. What About Dry Brushing and Guasha? Ok, I will be honest on this one: this is where social media often exaggerates things. There is currently no strong scientific evidence showing that dry brushing or guasha creates a special lymphatic drainage effect in healthy individuals. And I want this message to be clear: we are talking about healthy individuals, who are the vast majority of us. That doesn’t mean people cannot enjoy those practices, because they still have a meaning and a use. Indeed, any skin gentle stimulation would still have a major impact on the nervous system, specifically the parasympathetic (rest and digest one), which means it can still have a relaxation effect. Therefore, dry brushing may: Exfoliate the skin Increase temporary circulation at the surface Feel relaxing Guasha may: Feel relieved of muscle tension – and again, this is a nervous system response Temporarily increase local blood flow But neither appears to “detox” the body or dramatically improve lymphatic drainage in the way social media often claims, and most importantly, none of the effects mentioned above last for a long time, nothing like or in comparison to a good walk or exercise time. So let’s be clear about what does what, and let’s remember that the human body already has highly sophisticated systems for managing waste and fluid balance: The lymphatic system The liver The kidneys The lungs The digestive system And again, most healthy people do not have a “blocked” lymphatic system. What science says about those tools? Interestingly, even some of the more positive research around guasha comes with important limitations that are often ignored on social media. Indeed, a study published by Sun‐hee A. et al (2025) that looked at facial roller massage and guasha found some short-term improvements in facial contour measurements, muscle tone, and skin elasticity. However, the researchers themselves acknowledged several limitations, including: The small sample size – only 34 participants The short 8-week duration – already longer than other studies They only looked at temporary aesthetic outcomes rather than meaningful health changes to the lymphatic system itself In fact, the study did not demonstrate that guasha “detoxifies” the body or improves lymphatic drainage in healthy individuals. In other words, while these techniques may temporarily affect appearance, circulation, tissue tension, or relaxation, that is very different from the dramatic claims often made online about “flushing toxins” or “resetting” the lymphatic system. Where Manual Lymphatic Drainage (MLD) Can Be Helpful Ok, if you got this far in the blog, it means you are actually serious about your wellbeing. Great! As a Clinical Myotherapist and Vodder MLD therapist, I am with you. Now, it is important to separate evidence-based treatment from wellness marketing. Manual Lymphatic Drainage (MLD) is a gentle, specialised treatment approach designed to support lymphatic flow and fluid movement. MLD can be beneficial for people experiencing: Lymphoedema Lipoedema Chronic venous insufficiency Post-surgical swelling Scar recovery Chronic inflammation Swelling after injury Sunburn recovery MLD may also support general well-being because it is deeply […]
May
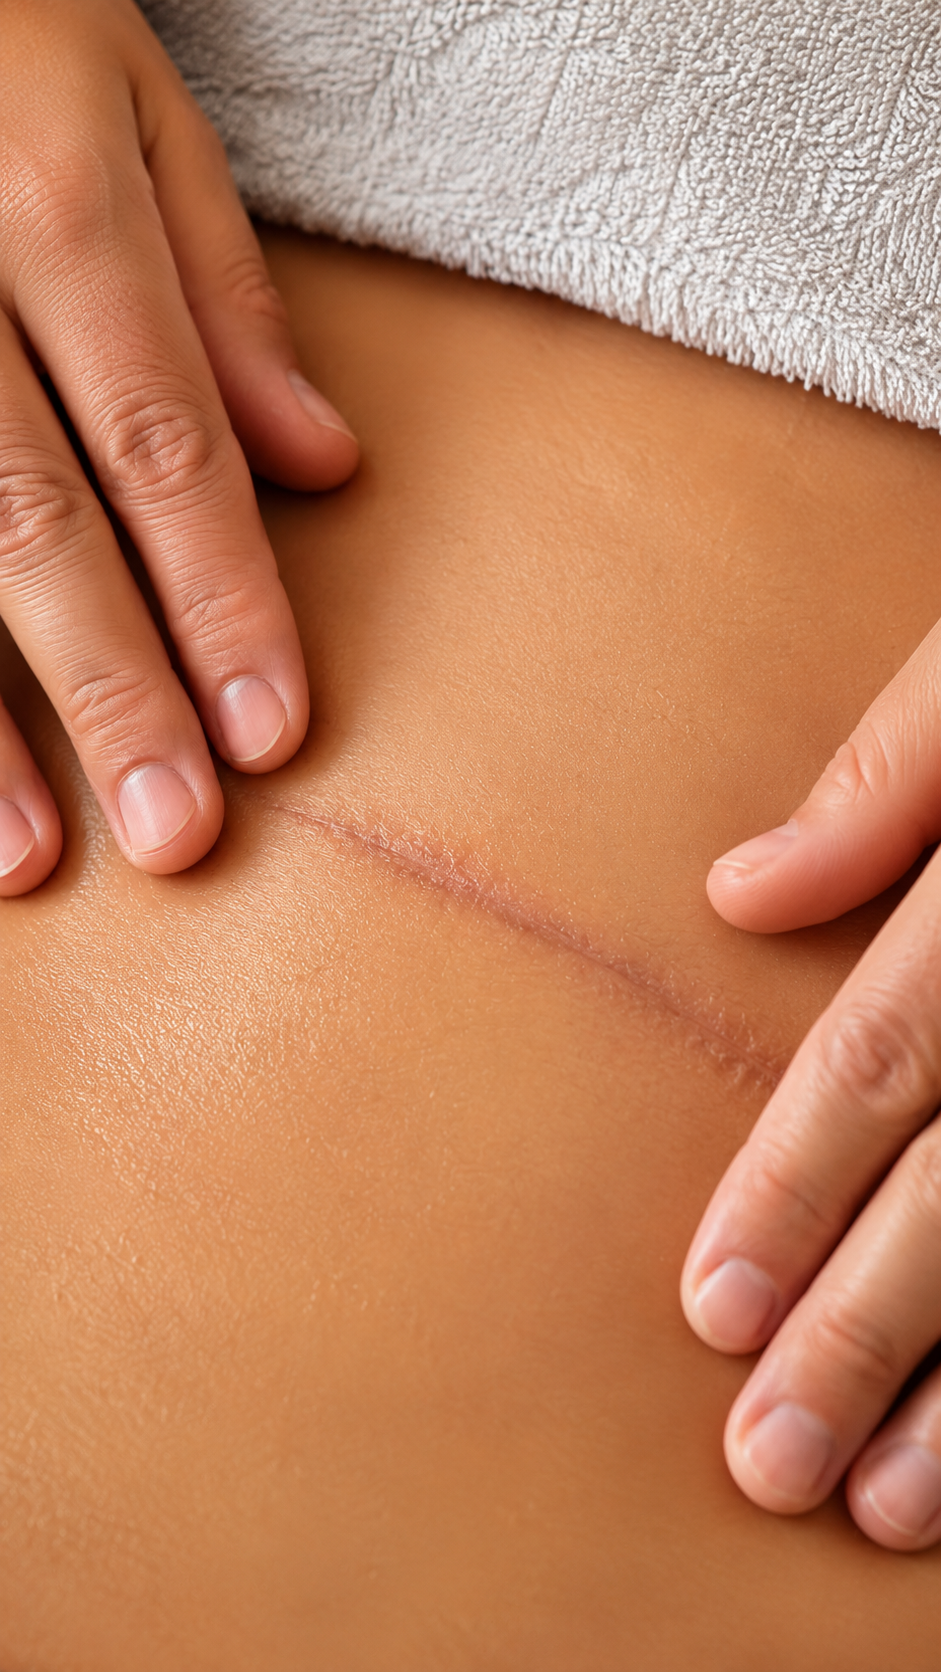
Cosmetic procedures like liposuction are getting more and more popular, with people looking to reshape and contour specific areas of their body. From abdominal sculpting to arm contouring and chin reduction, modern liposuction techniques offer a wide range of options depending on your body goals, recovery expectations, and overall health. At Melbourne Massage and Treatment Myotherapy Clinic in Coburg, I specialise in Manual Lymphatic Drainage (MLD), in Vodder style, to support clients before and after cosmetic surgery procedures. In fact, MLD is commonly recommended as part of post-operative recovery because it may assist with swelling reduction, circulation, tissue healing, and comfort during recovery. But as already mentioned in another blog, if you are aiming to get a cosmetic surgery done, you should start your MLD treatment the week before surgery, to obtain the best results. What Is Liposuction? Liposuction is a surgical cosmetic procedure designed to remove stubborn fat deposits from targeted areas of the body. On one hand, liposuction is not considered a weight-loss solution, because you would regain weight if you don’t learn how to balance the energy intake to the energy burnout, but it can help contour areas that may not respond to exercise and diet alone, as it can happen in a Lipoedema presentation. Now, different liposuction techniques are used depending on the treatment area, amount of fat removal required, skin elasticity, and patient goals. Common treatment areas include: Abdomen and waist Thighs Hips and flanks Arms Back Chin and neck Chest Buttocks Knees and calves What happens when you go for a cosmetic procedure is that your lymphatic system is heavily affected, and it will have to deal with excessive inflammation to support the recovery as part of your surgical journey. Types of Liposuction Cosmetic Procedures Traditional Liposuction (Tumescent Liposuction) Tumescent liposuction is one of the most commonly performed forms of liposuction. During this cosmetic procedure, a sterile fluid containing saline, anaesthetic, and medication is injected into the treatment area before fat removal. Best For: First-time liposuction patients Moderate fat removal General body contouring Common Treatment Areas: Abdomen Love handles Thighs Arms Back Recovery Considerations: After traditional liposuction, swelling, bruising, and fluid retention are common symptoms. That’s where MLD may help support the body’s natural lymphatic function and encourage smoother recovery. At Melbourne Massage and Treatment in Coburg, I work closely with post-operative clients to help manage swelling and discomfort during recovery. VASER Liposuction VASER liposuction is a modern type of cosmetic procedure that uses ultrasound technology to break down fat cells before removal. Those techniques are often chosen for more precise body sculpting and definition. Best For: Athletic body contouring High-definition sculpting Patients who want more precise shaping Common Treatment Areas: Abdomen Chest Arms Waistline Back Recovery Considerations: Although VASER liposuction can be less invasive in some cases, swelling and inflammation are still expected during healing. Post-surgical Manual Lymphatic Drainage may assist with fluid movement and help clients feel more comfortable throughout recovery. Laser Liposuction (SmartLipo) Laser-assisted liposuction, as the name says, uses laser energy to liquefy fat before removal. This type of intervention is commonly recommended for smaller areas and may also assist with skin tightening. Best For: Smaller treatment areas Mild skin laxity Patients wanting subtle contouring Common Treatment Areas: Chin and neck Arms Inner thighs Lower abdomen Recovery Considerations: Even minimally invasive cosmetic procedures can create swelling and tissue sensitivity. This happens because the body still goes through a traumatic event when body tissue is removed. Water-Assisted Liposuction (Body-Jet Liposuction) Water-assisted liposuction uses a gentle stream of fluid to loosen fat before extraction. This technique is often considered less traumatic to the surrounding tissue. Best For: Patients want gentler fat removal Smaller to moderate fat reduction Faster recovery expectations Common Treatment Areas: Abdomen Hips Thighs Arms Recovery Considerations: While recovery may be smoother for some patients, swelling and fluid build-up can still occur. Power-Assisted Liposuction (PAL) Power-assisted liposuction uses a vibrating cannula to help break apart fat more efficiently during removal. Best For: Larger fat removal procedures Fibrous areas of the body Revision liposuction procedures Common Treatment Areas: Back Male chest Abdomen Flanks Recovery Considerations: Because PAL can involve larger treatment areas, swelling management is extremely recommended pre- and post-cosmetic procedures. So yes, again, MLD and not a generic lymphatic massage, is the way to go for your best recovery outcome. Which Liposuction Cosmetic Procedure Is Right for You? Choosing the right liposuction technique depends on several factors, including: Your body goals Skin elasticity Overall health Desired recovery time Areas being treated Surgeon recommendation A qualified cosmetic surgeon will assess your suitability and explain which technique best aligns with your expectations. If you decide to go overseas for your cosmetic procedures, I would strongly recommend triple-checking the qualifications of the surgeon who is going to deliver the surgery, and also triple-checking the web for feedback and reviews about the clinic. But don’t forget that regardless of the cosmetic procedures chosen, post-operative care plays a major role in healing and final results. Why Manual Lymphatic Drainage Is Important for Your Cosmetic Procedures Best Outcome Manual Lymphatic Drainage (MLD) is a gentle, pain-free hands-on treatment technique designed to stimulate the lymphatic system and encourage natural fluid movement throughout the body. After liposuction surgery, the body commonly experiences: Swelling Bruising Fluid retention Inflammation Tightness and discomfort Fibrosis All those symptoms are the result of a traumatic body experience, which would leave your lymphatic system with lots of dead cells and excess fluid to deal with. Because the lymphatic system helps remove excess fluid and waste from tissues, supporting this system during recovery may help improve comfort and healing. Potential Benefits of MLD for Post-Cosmetic Procedure Many clients seek Manual Lymphatic Drainage after cosmetic surgery to help with: Reducing swelling and puffiness Supporting circulation Encouraging lymphatic flow Assisting tissue healing Improving comfort and mobility Helping soften areas of firmness during recovery Supporting smoother recovery outcomes Recovery experiences vary between individuals, indeed MLD is what I got to offer for your recovery, but movement, […]

May
MLD for cosmetic surgery is often seen as a treatment post-surgery. And while it is extremely important that you get your MLD done as soon as after surgery, it is actually even more important that you get it done before your surgery. Therefore, in this blog, we are going to talk about why MLD for cosmetic surgery is important pre- and post-intervention, and what the differences in outcome are. Cosmetic Surgery Is Controlled Trauma Any type of body surgery, cosmetic or orthopedic, even when it is elective and expertly performed, is still experienced as a trauma. Specifically, to cosmetic surgery, procedures such as: Liposuction Tummy tuck Breast augmentation or reduction Facelift Rhynoplasty BBL Arm or thigh lift Revision surgeries All of those create inflammation, fluid accumulation, tissue disruption, and stress on the lymphatic system and nervous system. In fact, after surgery, the lymphatic system suddenly has to manage: Increased inflammatory fluid Cellular waste Damaged proteins Bruising by-products Swelling Reduced movement and circulation So now imagine how your lymphatic system can deal with it, as it was not prepared for all this increased work. That’s when recovery can become slower and more uncomfortable. Therefore, pre-operative MLD becomes extremely valuable if you want the best results. MLD is Not a Generic Lymphatic Massage When I talk about MLD, I am specifically referring to Manual Lymphatic Drainage in Vodder style, not a generic lymphatic massage. I already dedicated a full blog post to this topic, and you can find the link here. And in summary, this is due to the fact that MLD is the only science-backed therapy that proves to stimulate the lymphatic system and has some positive effect on your wellbeing. Also, a Vodder MLD course is not a weekend training, but is an extensive ongoing training, which comes with continuous learning and revision courses. I have personally completed more than 90 hours of training with the Vodder Academy since I started my MLD adventure in November 2021, including my Lymphoedema and advanced body training (specifically for cosmetic surgery and pre- and postpartum scenarios). What Vodder-Style MLD Actually Does Vodder-style MLD is not a massage for muscles, and again, it is not a generic Lymphatic Massage. MLD in Vodder Style is a highly specialised and extremely gentle manual therapy designed to stimulate lymphatic vessels, improve lymph transport, and support the body’s fluid regulation mechanisms. In comparison to many other lymphatic treatment, MLD is not an aggressive massage technique, and it works directly with the physiology of the lymphatic system. The treatment uses precise rhythm, pressure, direction, and sequencing to: Stimulate lymphangiomotoricity Improve lymphatic drainage pathways Reduce stagnation Enhance tissue fluid movement Calm the nervous system Prepare tissues for inflammatory stress This matters enormously before surgery. Furthermore, MLD is a pain-free technique, and that’s why it is also effective in post-surgery settings. In fact, when you come out of a cosmetic surgery, the level of inflammation, swelling and bruising is extreme, and being gentle while working on the body is essential, not to keep stimulating pain and therefore inflammation response. Why MLD Before Surgery Makes Sense Let’s break down why MLD before cosmetic surgery is the way to go for the best surgery outcome. 1. It Prepares the Lymphatic System Before It Gets Overwhelmed Now, think of the lymphatic system like drainage infrastructure before a storm. If drainage channels are already congested, even a moderate storm creates flooding. But if the system has been boosted, and it is moving efficiently beforehand, the body manages the excess of liquid and debris much more effectively. So simply, pre-operative MLD helps optimise lymphatic flow before surgical trauma occurs. In this case, patients often notice: Less post-operative swelling Faster reduction in fluid accumulation Less heaviness and tightness Easier early recovery 2. Healthier Tissue Responds Better to Surgery Body tissue healing is possible thanks to the exchange of fluid and tissue oxygenation. So, tissues with better fluid exchange and circulation generally heal more efficiently. Therefore, when tissues are congested or inflamed prior to surgery, oxygenation and nutrient exchange may already be compromised. By improving lymphatic circulation before surgery, we help create a healthier tissue environment before the surgeon even begins the procedure. 3. It Can Help Reduce Fibrosis Risk One of the biggest complications after cosmetic surgery, especially liposuction, is fibrosis. Fibrosis develops when inflammation, fluid stagnation, and healing processes become disorganised within the tissue. While post-operative care is critical, pre-operative lymphatic preparation may help reduce the intensity of inflammatory congestion that contributes to fibrosis formation in the first place. This is particularly important for patients who: Have had previous surgeries Scar easily Tend to swell significantly Have inflammatory conditions Have sedentary lifestyles Experience fluid retention 4. The Nervous System Matters More Than People Think Now, so far we spoke about the role of the lymphatic system in the pre/post-cosmetic surgery time, but good recovery is not only mechanical. In fact, the autonomic nervous system plays a major role in inflammation, healing, immune function, and tissue repair. Vodder-style MLD has a profoundly calming effect on the nervous system. Many patients report improved sleep, reduced anxiety, and a greater sense of regulation before surgery. Entering surgery in a less stressed physiological state can positively influence recovery outcomes. Why I Recommend 3 Sessions Before Cosmetic Surgery Over my training and experience as a Manual Lymphatic Drainage therapist, I’ve found that three pre-operative sessions create the best preparation effect for most cosmetic surgery patients. Session 1 As per any first-time MLD treatment, the basic concept is to start “emptying the bucket, before it gets reloaded”. So we will focus on stimulating the connection between the Lymphatic System and the blood stream, where the drainage happens. This means a “long session on cervical and clavicle area”, followed by work done on the area that would be of interest to the surgery. Session 2 Again, keep focusing on maintaining the drainage activity, so always start at the cervical and clavicle area, but this time, with a short treatment, and keep maintaining […]