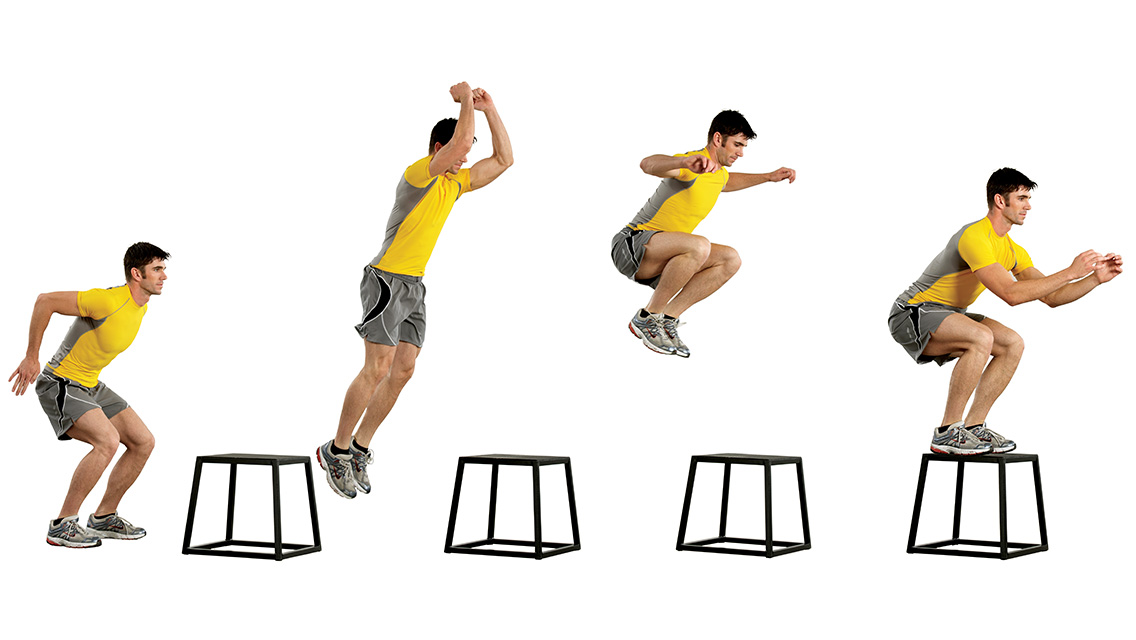
While training muscles is the most common thing you would see and do in a gym, it is less common to see someone and probably yourself, doing tendon training. Indeed, a lot of people go for heavy lifting, pushing volume, chasing strength which are all great deal of work for longevity and wellbeing. But there’s a piece of the puzzle that often gets ignored: tendons. Tendon Training vs Muscle Training Tendons and muscles are two different body soft structures that need load to stay strong. Tendon, as you may know, is the soft tissue that connects muscle fibres to the bone. Other differences between tendons and muscles are that tendons have little blood and innervation supply, but also a completely different type of fibre organisation and structure. When you start a strength program, your muscles adapt relatively quickly. Within weeks to months, you’ll notice increases in strength and size, based on the type of training you do. Tendons, on the other hand, are slower to respond, given the key difference we listed above. In support of this statement we have a systematic review by Bohm et al. (2015), on tendon mechanical properties, which shows that tendon training requires longer and more specific loading to build stiffness and resilience. So, what does that mean in real life? Well, simply means that lifting heavy on its own would not be enough to strengthen your tendons, and improve their spring and sprint loading capacity. That’s where, if you want to improve your run, jumps, or lift heavier, you also need to consider specific tendon training. That mismatch is one of the most common reasons why people injure themself after a while they do lifting as training. Why Tendon Training Matters for Injury Prevention Given the fact that tendons connect muscles to the bone, their role is to transfer force between those two structures. Therefore, every time you: Run Jump Change direction Lift explosively Your tendons are doing the heavy lifting behind the scenes. And all those movements, as you may notice, are explosive motions. Indeed, without proper tendon training, they become the weak link. This is especially relevant for injuries like: Achilles tendinopathy Patellar tendon pain (jumper’s knee) Hamstring tendon issues Tendon tears These aren’t just “overuse injuries”, but those are often underprepared tissue injuries. Strength Training Alone Isn’t Enough If you have red some of my blogs, or you have been to my clinic, you know that I’m a big believer in strength training. It builds muscle capacity and is essential for long-term health. There is no better medicine than exercise; it is a fact, not my opinion only. But, when we look at the specificity of traditional strength training, we can se that is usually: Slow Controlled Focused on muscle contraction Tendon training needs more than that. Tendons also need exposure to fast, elastic loads, the kind you experience in real, everyday movement. Plyometrics: The Missing Piece for Your Training This is where plyometrics come in. Plyometric exercises, like hopping, jumping, and bounding, are a key part of effective tendon training because they: Improve tendon stiffness Increase energy storage and release Prepare your body for dynamic movement When looking into research, we have a paper by Kubo et al. (2017), which demonstrates that plyometric training improves tendon mechanical properties, making them more resilient under load. Therefore, we have to change the way we think of tendons, visualise them as a spring, not as a static tissue. In fact, a well-trained tendon can: Absorbs force Stores energy Releases it efficiently On the other hand, an untrained tendon: Struggles under load Fatigues quickly Becomes prone to injury So, What Good Tendon Training Looks Like? By now, you may have a clue about what the answer to the above question can be, and if your training only includes slow strength work, you’re missing a crucial component. A well-rounded tendon training approach includes: Strength training – to build muscle capacity Isometric exercises – to start loading the tendon safely Plyometrics – to develop elastic strength and resilience It’s not about doing everything at once, but it’s about progressing properly. How I Use Tendon Training With My Clients My approach to training someone, either starting from an injury recovery with a myotherapy or remedial massage session, or via 1:1 fitness class, is to focus on building your body step by step. My approach to tendon training is simple: Mobility drill Start with controlled strength Introduce tendon-specific loading Progress into plyometrics when your body is ready This approach follows no guesswork. No rushing. Just smart progression. Final Thoughts on Tendon Training When you find yourself in a recurring pain or injury situation, it might not be your muscles that are the issue, especially if your sport activity is running, or anything based on sprint motion and quick change of direction. That’s where it is worth it to start thinking about what your tendon training has been like. When you train tendons properly, you get: Better performance More efficient movement Reduced injury risk Here at Melbourne Massage and Treatment in Coburg, I can help you revise your training choices through my 1:1 Fitness Classes. We’ll build a body that’s not just strong but resilient where it matters most.
Category Archives: Blog

Blog
Why I Chose Coburg for My Myotherapy Clinic
I had been looking for a new space to relocate my Myotherapy Clinic, and when [...]
Continue readingJul
Blog
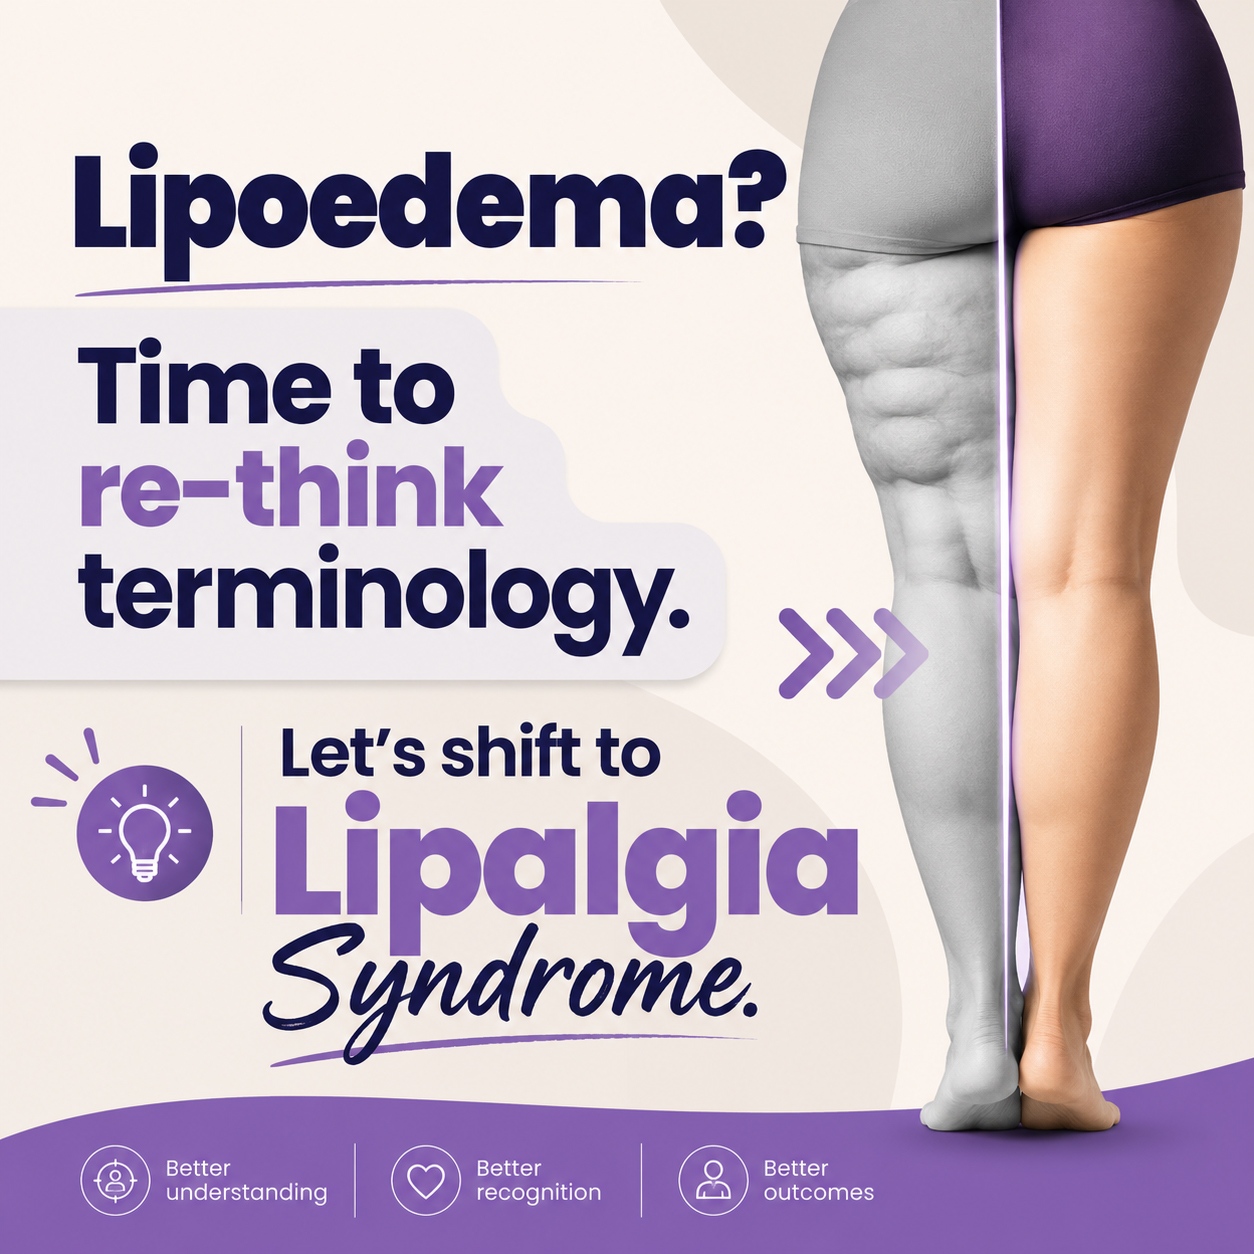
Lipalgia Syndrome or Lipoedema? Why the Name Matters
Lipalgia Syndrome is a name for a condition that most often, and more commonly, we [...]
Continue readingJul
Blog
Melbourne Massage and Treatment Is Returning to Coburg in July 2026
After two wonderful years in Fitzroy North, I am now ready to announce that Melbourne [...]
Continue readingBlog
When You Should Stop Running? And For How Long?
Here at Melbourne Massage and Treatment, Myotherapy Clinic in Coburg, when treating patients who love [...]
Continue reading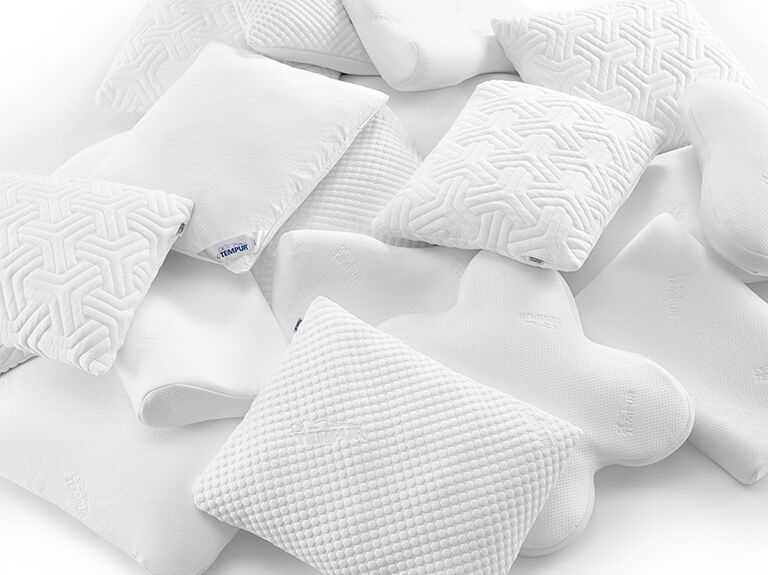
Blog
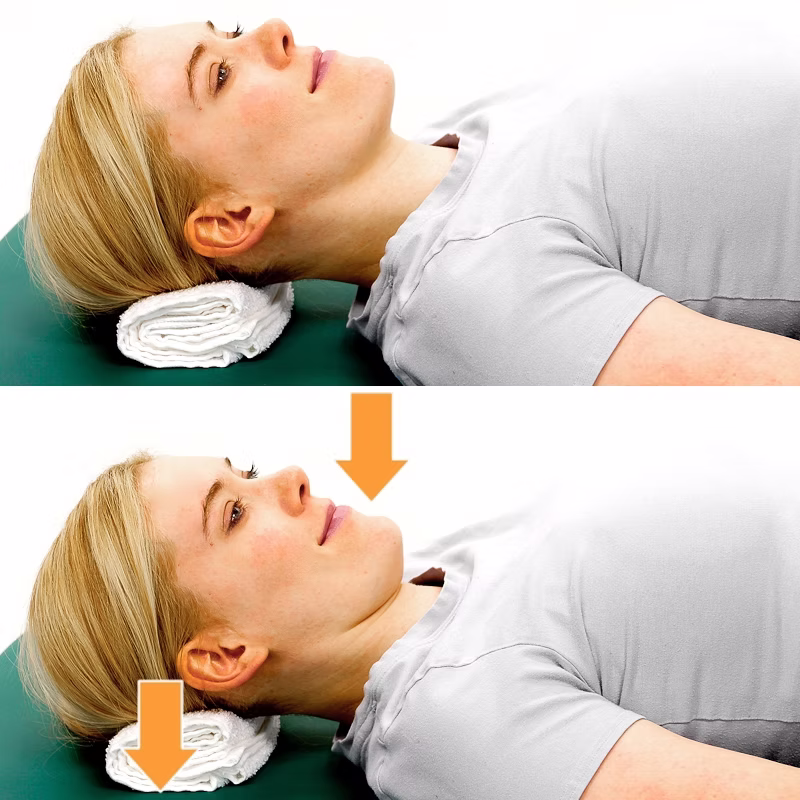
Pillow For Neck Pain: What You Need To Know
When treating someone for neck pain, a common question I get asked is: “Should I [...]
Continue readingJun

Apr
In this blog, we are going to look into why grip strength is one of those things that you should be on top of, and if you notice that you are in deficit of it, it’s time to act. Indeed, grip strength is an indicator of lifespan, and below, I am going to explain why. Grip Strength: The “Hidden” Vital Sign In a recent study by Chi et al. (2024), with a cohort of 9500 participants, it was found that weak grip strength was consistently associated with higher all-cause mortality across all ages and both sexes. What was even more striking about this study, that got published in Nature, was that: Individuals in the lowest grip strength group had more than double the risk of death compared to stronger individuals. This wasn’t a niche finding, but it held true regardless of body size, age, or gender. In simple terms: the weaker your grip, the higher your risk. And it is important to understand that it is not a weak grip that causes mortality, but it is just an indicator. The weaker your grip strength, the higher the chance of death from any cause. It’s Not About Your Hand Grip Strength, It’s About Your Whole Body Now, let’s make it even clearer, because here is where many people get lost. A weak grip isn’t just about your forearm muscles or joints, but it’s a proxy for total body strength and function. In fact, research shows that grip strength reflects: Muscle mass Nervous system function Cardiovascular health Overall physical resilience And this is possible because if you are training your body, either for endurance or hypertrophy, you will find yourself lifting heavy, and heavy enough that your grip capacity must improve and stay strong. As a consequence of lifting heavy and moving the body under load, you will also improve your muscle mass and bone mass, but reduce cardiovascular disease risk, loss of functionality and mobility. The Aging Connection: Strength = Survival I assume that we are familiar with the concept that as we age, we naturally lose muscle (a process called sarcopenia). But what is really important to know is at what rate we lose strength. In another recent clinical study (2025) it was found that grip strength predicts mortality even in specific populations, such as older adults recovering from hip fractures. In fact, a hip fracture is one of the worst incidents that can happen to an older person, because they can lose their autonomy and ability to move around. So, more in-depth, what does that tell us? Strength isn’t just about performance; it’s about survival. And this is how it unfolds: A weak grip would reduce your ability to: Catch yourself when you fall Carry groceries Maintain independence Recover from illness or injury And all of these factors influence lifespan. Why Grip Strength (this) Matters for You (Right Now) If you have already been to my clinic in Coburg, you would know that I don’t like to coat my communication in sugar. About your health, I will be honest and upfront: You don’t suddenly become frail at 70.You build toward it, or away from it, starting now. Indeed, your grip strength is like a “check engine light” for your body. And when it’s low, it often means: You’re not training enough strength Your muscle quality is declining Your long-term health is at risk On the other hand, before we assume you have only a weak grip strength, we will definitely look into any form of tendinopathy at the elbow or any form of nerve entrapment from your cervical area to your fingertips. The Good News: You Can Change This So, weak grip strength isn’t a life sentence, but indeed a wake-up call. And it is a wake-up call, because it is never too late to join a 1to1 fitness class. To support this, we indeed have research that shows that muscle strength is highly trainable at any age. And when you improve it: You reduce mortality risk You improve mobility and independence You enhance overall well-being What We Do at Melbourne Massage and Treatment At Melbourne Massage and Treatment, Myotherapy clinic in Coburg, we don’t just treat pain, but we build resilient bodies. Our fitness classes for longevity and wellbeing are designed specifically to: Improve full-body strength (including grip) Support joint health and mobility Reduce injury risk Help you stay strong for life, not just for now Because here’s my philosophy: Step by step, but move more, live well. In conclusion Don’t ignore the small signals. A pain response is, yes, a body signal that something is not right, and a pain that lasts longer than 72 hours needs to be addressed. On the other hand, grip strength might seem simple, but it’s one of the clearest windows into how your body is ageing. Train it. Respect it. Improve it. And if you don’t know where to start, book an Initial Consultation now. We’ll build that strength together.

Apr
Neck pain and or upper back pain often originates from a disbalance of mobility and stability joints along the spine, including poor scapula-thoracic joint stability and thoracic mobility. Indeed, a hypermobile scapula can lead to instability, muscular imbalances, and chronic tension in either the shoulder joints or the cervical. Therefore, assuming that neck pain is only a neck issue is a bit limiting. We need to look at the bigger picture and target the right reason why you are in pain. In this blog, we are going to look at how scapular stabilisation exercises can restore balance, enhance posture, and reduce neck pain. Understanding Scapular Stability and Hypermobility The scapula, or shoulder blade, plays a vital role in upper-body movement and stability. It acts as the foundation for arm motion, connecting the humerus to the thorax through the scapulothoracic joint. When control is compromised, which is common for those with general hypermobility or for those who have scapular hypermobility, the result can be excessive movement and discomfort. Consequences of having a hypermobile scapula are: Neck and shoulder pain Reduced athletic performance Increased injury risk Muscle fatigue and tension As is often recommended, we need to look at strengthening as a way to improve muscular control of the joint, and in this case, we would look at: rhomboids, trapezius (upper, middle and lower), and latissimus dorsi, which is essential for restoring balance and function. Mobility Comes First: The Foundation of Stability As already mentioned in so many other blogs, and as I educate my clients all the time, before introducing strengthening exercises, mobility must be addressed. A stiff thoracic spine forces the scapula to compensate for many shoulder movements, leading to muscles originating and or inserting in the scapula to be overused, leading to pain and discomfort. Essential Thoracic Mobility Exercises There are some really easy exercises that you can do to pick up on thoracic mobility. Here is a short list: Foam Roller Thoracic Extensions Open Book Rotations Thread-the-Needle Cat-Cow Mobility Drill Diaphragmatic Breathing Exercises Those exercises would help in restoring thoracic mobility, preparing the groundwork for effective scapulothoracic stability exercises. Key Muscles for Scapular Stabilisation Now we can look at the muscle that we would need to strengthen to create a better scapular stabilisation. Rhomboids Function: Scapular retraction and stabilisation. Importance: Provide postural support and control during pulling movements. Recommended Exercises: Resistance Band Rows Prone T Raises Seated Cable Rows All those exercises can be easily delivered at home, with some decent resistance bands, or with light weights. But don’t let the simplicity of these rhomboid exercises fool you, as prone T raises, to start with, are enough even with no weights, as the weight of your arm is already enough. Trapezius (Upper, Middle, and Lower) Function: Elevation, retraction, and upward rotation of the scapula. Each fibre group has a different role regarding the scapula movement.Importance: The lower trapezius is essential for shoulder stability and posture. Recommended Exercises: Prone Y Raises Wall Angels Face Pulls Shoulder Shrugs Again, those exercises don’t require a full gym set-up, but some strong resistance bands and light weights would do. Latissimus Dorsi Function: Shoulder extension, adduction, and thoracic stability.Importance: Connects the upper limbs to the trunk and supports efficient movement. Recommended Exercises: Straight-Arm Pulldowns Lat Pulldowns Assisted Pull-Ups Resistance Band Pulldowns Scapular Stabilisation Exercises for a Hypermobile Scapula Now that we have looked at which exercises are ideal for what muscle or muscle group, we can look at a combination of those based on generic fitness levels. Those exercise lists are obviously a generic recommendation, and unless we have already done some work and assessment, I would not suggest picking and choosing an exercise routine and trying your best to sort out your pain. Beginner Level Scapular Setting Exercises Wall Slides Isometric Holds Against a Wall Serratus Anterior Punches Intermediate Level Prone Y and T Raises Resistance Band Pull-Aparts Face Pulls Incline Dumbbell Rows Advanced Level Landmine Presses Farmer’s Carries Overhead Carries Pull-Ups with Controlled Scapular Movement Furthermore, these exercises for scapular stability enhance neuromuscular coordination and are particularly beneficial for individuals with hypermobility. How Scapular Stability Reduces Neck Pain While we can’t directly associate hypermobility of the scapula with neck pain, we also know that poor scapular control often leads to overactivation of the upper trapezius and cervical muscles, contributing to neck pain. By strengthening the stabilisers of the scapulothoracic joint, mechanical stress on the neck is reduced. Therefore, here is a list of the benefits of scapular stabilisation exercises: Improved posture Reduced neck and shoulder pain Enhanced thoracic control Increased muscular endurance Better movement efficiency Lower risk of injury How We Support Scapular Stabilisation at Melbourne Massage and Treatment At Melbourne Massage and Treatment, in Coburg, the treatment of scapular stabilisation starts from a tailored assessment of your presentation, looking at: Overall hypermobility Your clinical history Past and present sports activities Site of pain Pain time frame That and more information are essential to understand what your experience is, and what we can do about it. Hands-on treatment, like remedial massage or myotherapy, would be the first step to relax the body and allow you to feel and move better. The next step from that would be guiding you throughout exercises that you can deliver at home or at the gym, at your own time, so that you can take control of your pain and your presentation. All of this can be easily delivered along a treatment plan. And to simplify the whole process, I also offer a FREE 15-minute Online Consultation, where we can start looking into your presentation and understand what has been done till now and what needs to be done at this stage.

Apr
If you have been at the clinic most recently, you may have heard me talk about LLLT (Low-Level Laser Therapy). LLLT is one of those tools that quietly adds a lot of value to any treatment modalities I get to offer, without making a big fuss, and without increasing the service fees. So yes, in this blog, we are going to look into why I use it, what the science says, and, most importantly, what it can do for you. First Things First: What Is Low-Level Laser Therapy? The simplest explanation I can share is that LLLT (also called photobiomodulation) uses specific wavelengths of light to stimulate your body at a cellular level. Indeed, LLLT is not a hot or burning type of laser, but it is a low-intensity, non-invasive light that interacts with your tissues to encourage healing and reduce pain. This is possible because LLLT stimulates the cell in producing more ATP energy (cell energy) which than can be used for the cell to replicate. Simply, it helps your body do what it’s already trying to do, just more efficiently. What Does the Science Say About Low-Level Laser Therapy? As a practitioner who offers his service based on scientific recommendations, I’m very particular about what I bring into the clinic. If it’s not backed by solid research, it doesn’t stay. Therefore, here’s what recent PubMed evidence tells us: Pain Reduction In a systematic review by Diaz et al. (2025), they looked at 44 randomised clinical trials and found that LLLT can reduce pain by 60–70% in certain musculoskeletal conditions (in this case, TMJ) while also improving function. When a systematic review shows such results, it is considered strong evidence. Supports Injury Recovery & Reduces Inflammation When looking at Lawrence J. Sorra K., (2024) review, that did focus on Low-Level Laser Therapy (LLLT) for Acute Tissue Injury or Sport Performance Recovery the highlighted facts about LLLT are: Modulate inflammation Improve tissue repair Support recovery after injury All with minimal risk or side effects. That said, in this review, it is also highlighted how, in acute injury, there is a lack of evidence for LLLT effectiveness. In conclusion, than, is shown how no side effects are present and how LLLT is a safe therapy to be add to other modalities, especially fitness classes. Works Best as an Add-On (Not a Replacement) About this last statement, that LLLT is not a substitute for other modalities, we have a meta-analysis by Awotidebe A. et al. (2019), which shows how LLLT can provide additional short-term pain relief when combined with exercise or therapy, even if it doesn’t always change long-term function on its own. And this is the key point most people miss. LLT is not magic; It’s a multiplier. Exercises are the medicine. Why I Use LLLT at Melbourne Massage and Treatment? I decided to invest in the usage of Low-Level Laser Therapy SymbyxBiome DuoCare 904, which operates in a wavelength range consistent with what research suggests is effective (typically around 800–900nm), as it can be an effective treatment modality to help my patient feel better, reduce their inflammation and pain, so that they can move better and be able to deliver exercises without bein in too much pain. And here is another important part: I don’t charge extra for it. Why? The answer is simpler than you may think. LLLT is not a “standalone service” in my philosophy; it’s a value-add. If it can: Reduce your pain faster Help your tissues recover better Improve your overall outcome Then, as with any other therapy, it belongs inside your session, not on top of your invoice. What LLLT Does Feel Like? When telling people what LLLT feels like, I respond with: “Drop your expectation”. In fact, you will feel: No heat No discomfort No downtime And yet, underneath the surface, your cells are being stimulated to: Produce more energy (ATP) Improve circulation Reduce inflammatory markers That’s where the real magic happens. It is a way to make your body do what it does normally, only faster. And there is no side effect. What Condition Can Benefit Best From LLLT? Conditions where LLLT is recommended for are: Persistent muscle pain Tendinopathies Jaw pain (TMJ) Post-injury recovery Fibrosis Scar tissue Any presentation would need treatment that lasts 10 to 20 minutes, and the frequency of treatment can be 2 to 5 times a week, with results of pain relief after 3 to 6 weeks. Those numbers vary depending on the type and location of the injury. What we know is that for the early stage, it is better to have more frequent treatment, and after week 1, the treatment can drop from 4 to 5 times a week to 3 times a week, till once a week for major injury if the treatment has to go on for 5 to 6 weeks. Why Frequency Matters As mentioned above, LLLT works by stimulating your cells, particularly the mitochondria, to produce more energy (ATP), which helps with: Tissue repair Reducing inflammation Pain modulation But that effect doesn’t last forever; cells need a more frequent stimulation to obtain the best results. Therefore, if sessions are too far apart, you lose momentum, but if they’re too close without reason, you’re not adding extra benefit. So that’s why, in the initial phase of an injury, we work more often to boost the recovery, and once the recovery is nearly optimal, and you are doing your exercises and structural strength, then the LLLT session can be placed further apart. What Is The Bottom Line Regarding Low-Level Laser Therapy? After so many years in the massage industry, and after all the research and studies of different modalities, there is one thing that I have learned. There’s no single “miracle treatment.” But, on the other hand, there are combinations that work extremely well together. Hands-on therapy + movement + the right adjunct tools, that’s where results happen. And LLLT is one of those tools. So drop your expectation of magic and no effort […]
Mar
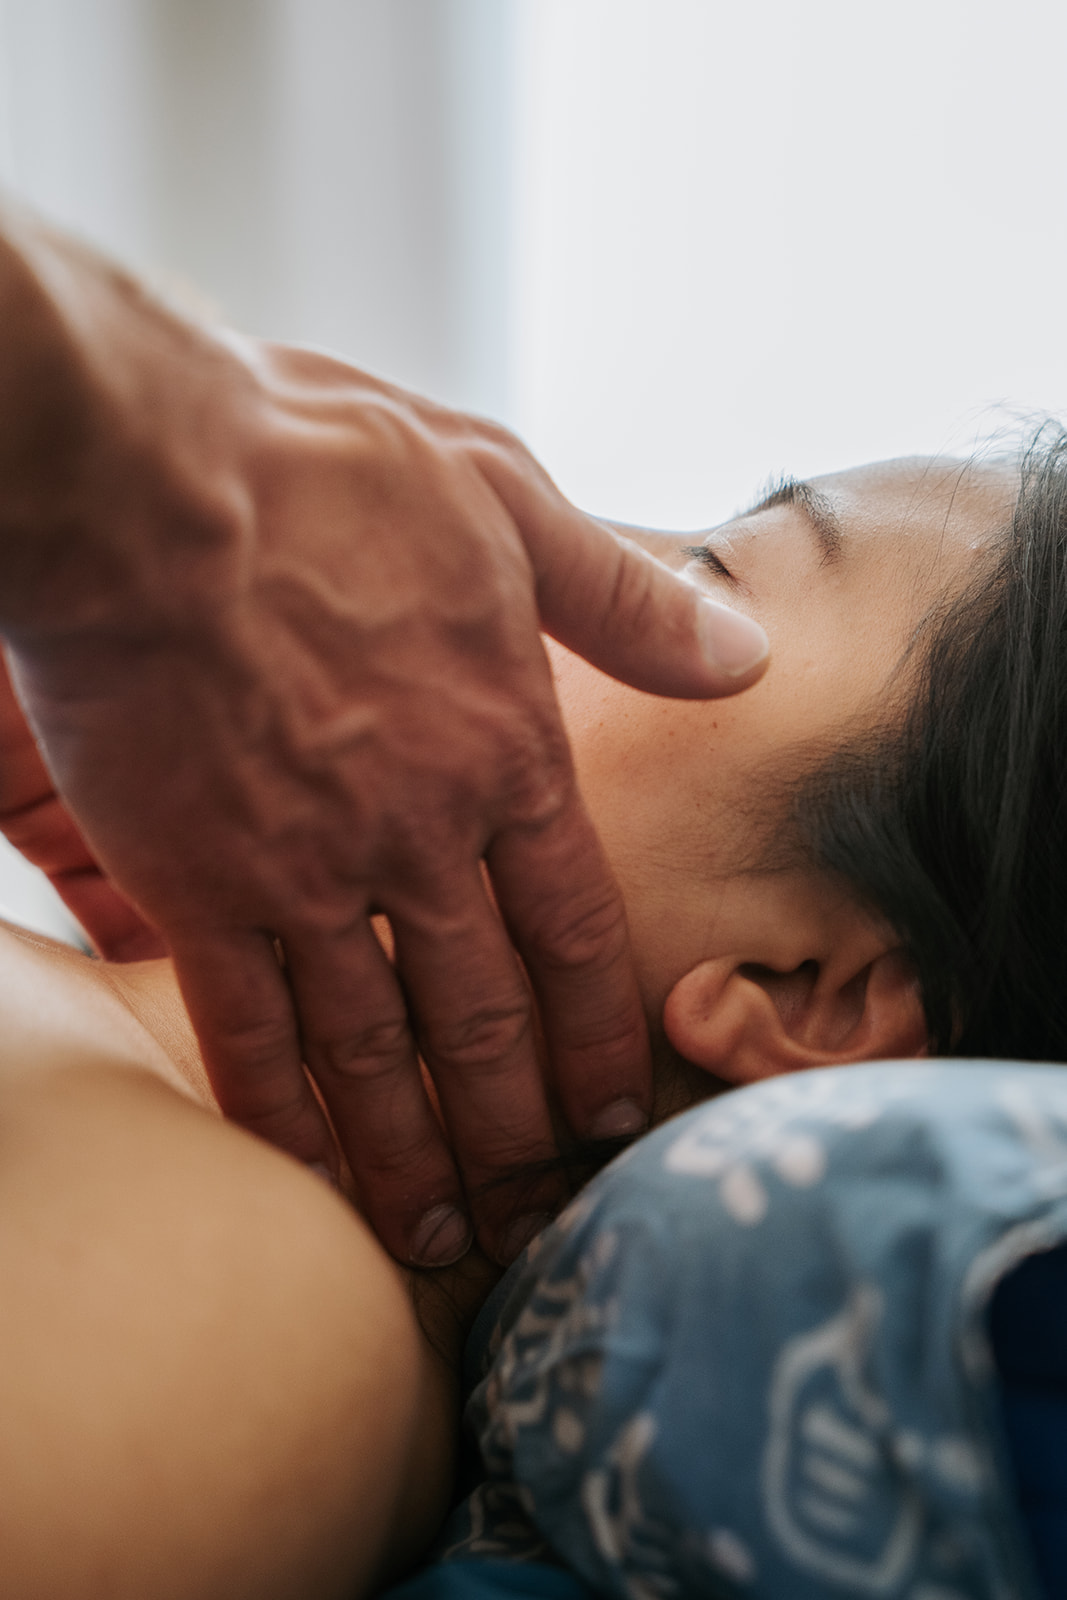
Neck pain is such a common presentation, and often I have to hear from my clients that it is due to them storing stress in their neck or shoulder. I can’t think of how many times I heard this, and how many times I than have to ask questions like: “When was the last time you did some neck-strengthening exercises or movement for your neck?” “If you work in an office, how many screens do you have in front of you, and which one do you look at more often?” “Have you ever had a whiplash? And if yes, have you done anything about it?” As you would imagine, the answers are anticipated by a moment of silence, thinking and then in order of question: “I never do neck strengthening exercises, at best I do some stretching”. “2 or 3 screens and I look at the one on one side most of the time”. “Yes, but it was xx years ago, and I haven’t done anything about it, as I was too young to care about it”. Now, I believe that those answers are already going to give you an idea of where that pain may come from. In fact, the neck isn’t just tight, it’s often weak and poorly controlled. To fix that, we need to understand how the neck actually works and how we can strengthen it. Why Neck Strengthening Matters (Mobility vs Stability) Each cervical spine is unique, and we can all present with different needs and capacities for movement. Indeed, a hypermobile person may find their neck to be really mobile and easy to twist and turn. Hypermobility, as discussed many times, is an advantage for flexibility, but it comes with the cons of joint weakness and a higher risk of joint injuries. So, when looking at the cervical area, we may notice that it sits at the top of the joint chain, meaning everything from your shoulders to your lower back influences it. Specifically, the cervical is made of 2 joint sessions: The upper neck (C1-C2) is built for mobility (turning, nodding) The lower neck (C2-C3) is built for stability (supporting your head) When that balance is off, you’ll often notice: Neck stiffness Headaches “Poor posture” (forward head position) Ongoing discomfort Fortunately, those statements are backed up by recent research that shows how strengthening deep neck muscles improves pain, posture, and neuromuscular control, especially when mobility and stability training are combined. Chin Tucks (Deep Neck Flexor Strengthening) Chin Tucks are simple and effective neck strengthening exercises that I often prescribe for neck pain. Let’s then look at a series of progressions for this type of exercise: Chin-Tuck in all four: Position yourself in all four, with hands under the shoulder, and knees under the hips You will be looking at the floor where you have placed an object, right between your hands. Now retract the chin, while you keep looking at the object between your hands. Release the chin and repeat. This version of chin tuck is ideal for: Early rehab. People with pain or poor control. Learning correct movement without compensation. Chin-Tuck in sitting or standing position: Sit or stand upright (standing is the ultimate progression). Gently pull your chin straight back (like making a double chin). Keep your eyes level. Anyhow, you are going to do these exercises, ensure to do them slowly, and take your time doing them. 4 to 5 second tempo. Why Chin Tuck Works for Your Neck Strengthening This exercise activates your deep cervical flexors, which are the stabilising muscles that support your neck. Those muscles can be defined as stabilisers as they go from the thoracic vertebrae to the upper cervical vertebrae, for the longus capitis, which originates in the lower portion of the cervical (C3-C6) and inserts at the basilar portion of the occipital bone. When these muscles are weak: Your head shifts forward Larger muscles overcompensate (SCM) Pain builds over time Isometric Neck Exercises (Build Stability in All Directions) Isometric exercises are an optimal exercise that places major focus on tendons and ligaments, and are ideal for acute symptoms and warm-up pre-training. How to do it: Place your hand on your forehead and gently push into it (no movement) Repeat on: Back of your head Left side Right side Hold each for 5–10 seconds Perform 5 reps per direction This form of exercise can be applied in any direction of movement, such as flexion, extension, lateral flexion, rotation and mixed movement, like flexion on the diagonal side. Why it works: Isometric exercises are applied to pain-free range of motions, so while you move and contract the tissues, you are not experiencing pain, your brain gets triggered to be safe while the body moves, and your musculoskeletal tissues get looked after as they get activated and contract. This would help in improving joint stability and control. Shoulder Shrugs – Let’s Make Those Muscles Work Shoulder shrugs are a simple but effective way to build neck stability through the upper trapezius, which plays a key role in supporting the cervical spine as part of the broader joint chain. How to do it: Take in your hands a pair of weights, or an elastic band, which would you make pass under your feet. Gently lift your shoulders up toward your ears, pause briefly, then lower them with control. Why it works: Shoulder shrugs exercise does work by placing shared-load capacity between the neck and shoulders, reducing the strain on the cervical spine. On the other hand, when working on the cervical joints, it is ideal to intervene also on joints that are muscle-connected to the cervical itself, by adding global muscular support, which is essential for everyday loads. How These Exercises Fit Into the Joint Chain Your neck doesn’t work alone. As mentioned in many other blogs, all the body’s joints are part of a bigger system, the joint chain of mobility and stability. Therefore, if you present with: Tight shoulders A stiff thoracic spine Lack of movement […]
Mar
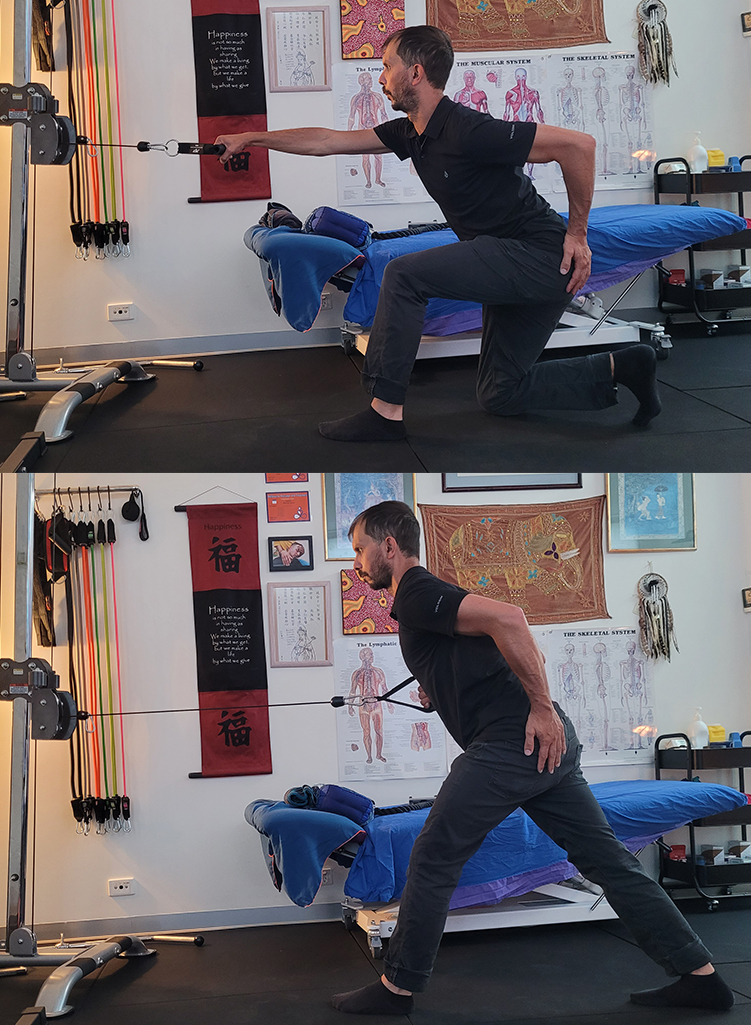
While I guide my client during a 1:1 fitness class at Melbourne Massage and Treatment, a Myotherapy clinic in Coburg, on how to learn using bands or a single-column pulley machine to practice KLT (Kinetic Link Training), I often get asked how someone should or shouldn’t do a lunge. “Should my knee go ahead of my toes?” “Should my knee stay on top of my ankle?” “What about my back? Should I hinge or stay straight?” The answer to those questions lies in a simple fact: what part of the body are you trying to train? Are you aiming to build more glut (posterior chain) or quads (anterior chain)? No, because there is no perfect lunge, as either right or wrong. As per the squat, there is the lunge that works for you, for your presentation and for your goal. The Two Main Lunge Strategies (And Why They Matter) So, when we talk about lunges, most people are really debating between two variations: Knee Travels Forward (Past the Ankle Line) When going for this variation, we have to conceptualise that the knee is going into a deep flexion, right? Now, if the knee has to come out of flexion, the quads are the muscle that needs to be engaged. (Quads are the knee extensors). The deeper the knee flexion, the more quads fibres are engaged to do the reverse to get the extension done. In fact, what this type of lunge does is: Increases knee flexion Increases quadriceps demand Places more load through the patellar tendon Furthermore, research shows that when the knee moves forward, quadriceps force and knee joint stress increase significantly. In a super summary: This is a quad-dominant lunge. Vertical Shin (Knee Stays Over the Ankle) On the other hand, when delivering a lunge movement and the knee stays on top of the ankle, within a vertical shin line, there is a max of 90° knee flexion; therefore, the amount of fibre engaged for the quads is less, and what is than the primary mover for the ascending action, is the gluteus maximum, the biggest glut, which is going to help with the hip extension. So, in this variation, what we are going to achieve is: Shifting the load away from the knee Increases contribution from the hip extensors Encourages more posterior chain involvement Therefore, this will be a glute-focused lunge. What Biomechanics Actually Tell Us About The Lunge Exercise While we look at this movement, we may get triggered into thinking that the lunge exercise is knee-dominant because the knee does a lot of movement, right? Well, if we break it down a bit more, as Riemann et al. (2012) did, we find that yes, the knee moves a lot, but what really takes the load during the lunge movement is the hip. So this is how we can break it down: The knee moves more (kinematics). But the hip produces more force (kinetics). Why this is a thing, then(?) you may ask. Well is tru that the knee move a lot, it can flex up to 90° and still this can be a hip dominant exercises, but, we have to think that the knee, while it is moving that far, is not placing much load on the lower fibers of the quads, and the joint that has to push against gravity, in the ascending phase, are indeed the hip. That’s where all the load actually is. The weight of the upper body. The Lunge Game-Changer: Add a Hip Hinge And here is where we can add a twist to the lunge, by going into hip hinging. What happens if we do so? The glutes are placed under greater stretch at their origin. This increases mechanical tension. You get better glute recruitment and carryover in strength. In fact, this is not just theory, but it’s basic muscle physiology: Muscles produce more force when stretched under load. Therefore, by hinging at the hip, you are not only going to feel more burning sensation in the glutes, but you are going to train them even more effectively. Why Toe Mobility Is the Missing Piece Now let’s talk about something almost no one considers: Your toes. As often happens, the toes and feet are not taken into consideration when looking at functional movement. Even though every leg movement starts from there. In a proper lunge, especially for the rear leg, your toes need enough mobility (extension) to: Accept vertical load Stabilise the movement Prevent your body from shifting forward Indeed, if you lack toe mobility: The movement gets projected forward Load shifts into the front knee and quads You lose posterior chain contribution To support those statements, a study by Harato et al. (2019) examined how foot and toe positioning directly affects knee mechanics and load distribution. So to clarify, the mobility-stability joint chain must always be taken into consideration when we look at functional movement. In this case, your toes aren’t just along for the ride; they’re controlling where the force goes. So… Which Lunge Is Best? I hope that by now, you have an idea of what answer is coming up: Neither. There is no best lunge, as there is no best squat. The forward knee lunge is not “bad”; it’s a tool for quads. The vertical shin lunge is not “safer”; it’s a tool for glutes. The mistakes are thinking that: One can replace the other one. Having an injury in the knee, and thinking that lunges are not your thing anymore. That’s why, at my clinic, Melbourne Massage and Treatment, here in Coburg, I always emphasise to my clients to understand that: “Don’t chase perfect technique — chase the right stimulus.” And to get to a better technique, better than what your body can deliver for now, is a step-by-step journey. And when there is an injury, we have to be confident in the tissue’s healing timeline, and exercises with load are the best tools to help with that. How I Use This With My Clients Inside […]
Mar
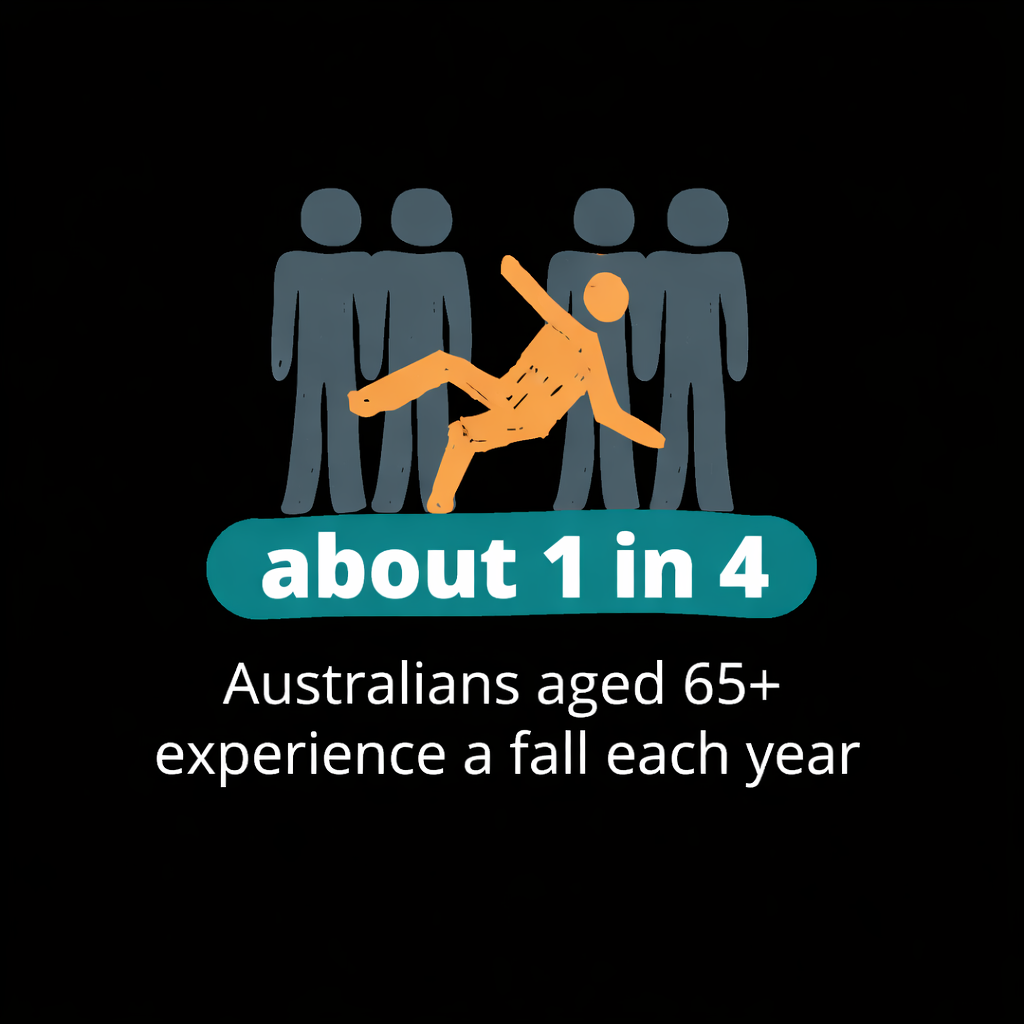
One thing that can really create terror while we age is falling. No matter the gender or the background, anyone who is getting older would never tell you that they want to get weaker or that they would not improve their skill in fall prevention. Indeed, as we age, maintaining balance becomes one of the most important aspects of long-term health. Therefore, let’s look at what muscle is extremely important for balance: the gluteus medius. As a Clinical Myotherapist here at Melbourne Massage and Treatment in Coburg, I always encourage my patients to undertake exercises, and in specific heavy lifting exercises, to promote their strength, stability, and make them independent from aids and support in their everyday life. And a good start is always to make them realise where their equilibrium is at, and make them aware of how the gluteus medius, particularly for women approaching or after menopause, can help prevent falls. The Hidden Role of the Gluteus Medius in Balance The gluteus medius, as the name suggests, is a glute muscle, and it is responsible for stabilising the pelvis when we stand on one leg, like when we walk, run, or even when we go up and down the stairs. Every step we take requires this muscle to activate. When functioning properly, the gluteus medius: Maintains pelvic stability Controls lateral balance Helps prevent excessive hip drop during walking Assists in reactive balance when we trip or lose stability Research from Chi S. A. et al. (2016) did show that older adults with degeneration or atrophy of the gluteus medius are more likely to fall and fracture a hip. These findings, together with other studies, highlight the crucial role of this muscle in equilibrium and fall prevention. The Real Danger of Falls as We Age Falls are one of the leading causes of injury in older adults. But what is most concerning is what happened after the fall. On top of all, another major complication is osteoporosis, especially in women. In another blog, we spoke about why women are more likely to suffer from this condition. So yes, as bone density declines, the risk of fragility fractures increases dramatically. This creates a dangerous cycle: Muscle weakness → instability Instability → increased fall risk Falls → fractures due to osteoporosis For many older adults, hip fractures can lead to reduced mobility, loss of independence, and long-term health complications. Different types of muscle fibres and their importance in fall prevention Type I – Slow-twitch fibers The slow-twitch fibres, as the name suggests, are fibres that may help maintain steady contraction but are not responsible for rapid corrections when balance is lost. Characteristics: Contract slowly Produce a lower force Highly resistant to fatigue Rich in mitochondria and oxygen-using enzymes Role: Posture control Balance stabilization Long-duration activities like walking And here is an example of muscles where we find these fibres: Postural muscles in the back: Erector spinae (longissimus, iliocostalis, spinalis), multifidus, and upper trapezius. Leg postural muscles include: Hip flexors and calf muscles Type IIa – Fast oxidative fibres Another name for this fibers are intermediate fast-twitch fibres. Their role is to cover the gap between the type 1 fibres, which are more slow-twitch type of muscle fibres, and the type IIx, which are the fastest fibres. Characteristics: Faster contraction than Type I Moderate force Moderate fatigue resistance Role: Activities requiring both endurance and power, like climbing stairs or brisk walking. Their presence is distributed throughout many body muscles, including the psoas and gastrocnemius. Type IIx – Fast glycolytic fibres In terms of fall prevention, those muscle fibre types are the most important. Characteristics Very fast contraction High force output Fatigue quickly Role Explosive movements Rapid balance recovery Reflexive muscle reactions What Happens With Aging (Sarcopenia) While we age, we develop what we call sarcopenia, which is basically a loss of muscle mass. Sarcopinia key changes include: Loss of fast-twitch fibers Type II fibres decline faster than Type I. Effects: Reduced power Slower reaction speed Higher fall risk Along with the muscle fibres declining, we also have a reduction in motor neuron function, where the nerves controlling fast fibres deteriorate, reducing recruitment. Other types of degeneration include increased stiffness, as connective tissue reduces elasticity and recoil. Role of Estrogen in Muscle Function As discussed in the menopause blogs about the role of hormones in women’s health, Estrogen plays a surprisingly important role in muscle health, too. This is possible because muscle cells have estrogen receptors, meaning the hormone directly affects muscle tissue. When estrogen levels fall (during Menopause), several changes occur, starting from: Accelerated loss of fast-twitch fibres. Reduced muscle protein synthesis, which means slower muscle repair and growth signalling. Increased inflammation, which again slows down the muscle recovery. Changes in connective tissue, as Estrogen helps maintain collagen turnover, and here we look more at tendons and Ligaments. Reduced neuromuscular efficiency, including nerve conduction and motor unit activation. Why Strength Training and Fitness Classes Matter for Longevity So, the good news is that muscle function can be improved at any age, and plenty of research consistently shows that resistance training significantly improves muscle mass, strength, and functional capacity. In summary, strength training can help with: Increase muscle mass Improve neuromuscular coordination Enhance balance reactions Reduce fall risk Support bone density That’s why at my clinic in Coburg, I encourage my clients to take up fitness classes, to get their body moving under load, because this is the best way to help the body stay active, regenerate and keep up with fall prevention.
Mar
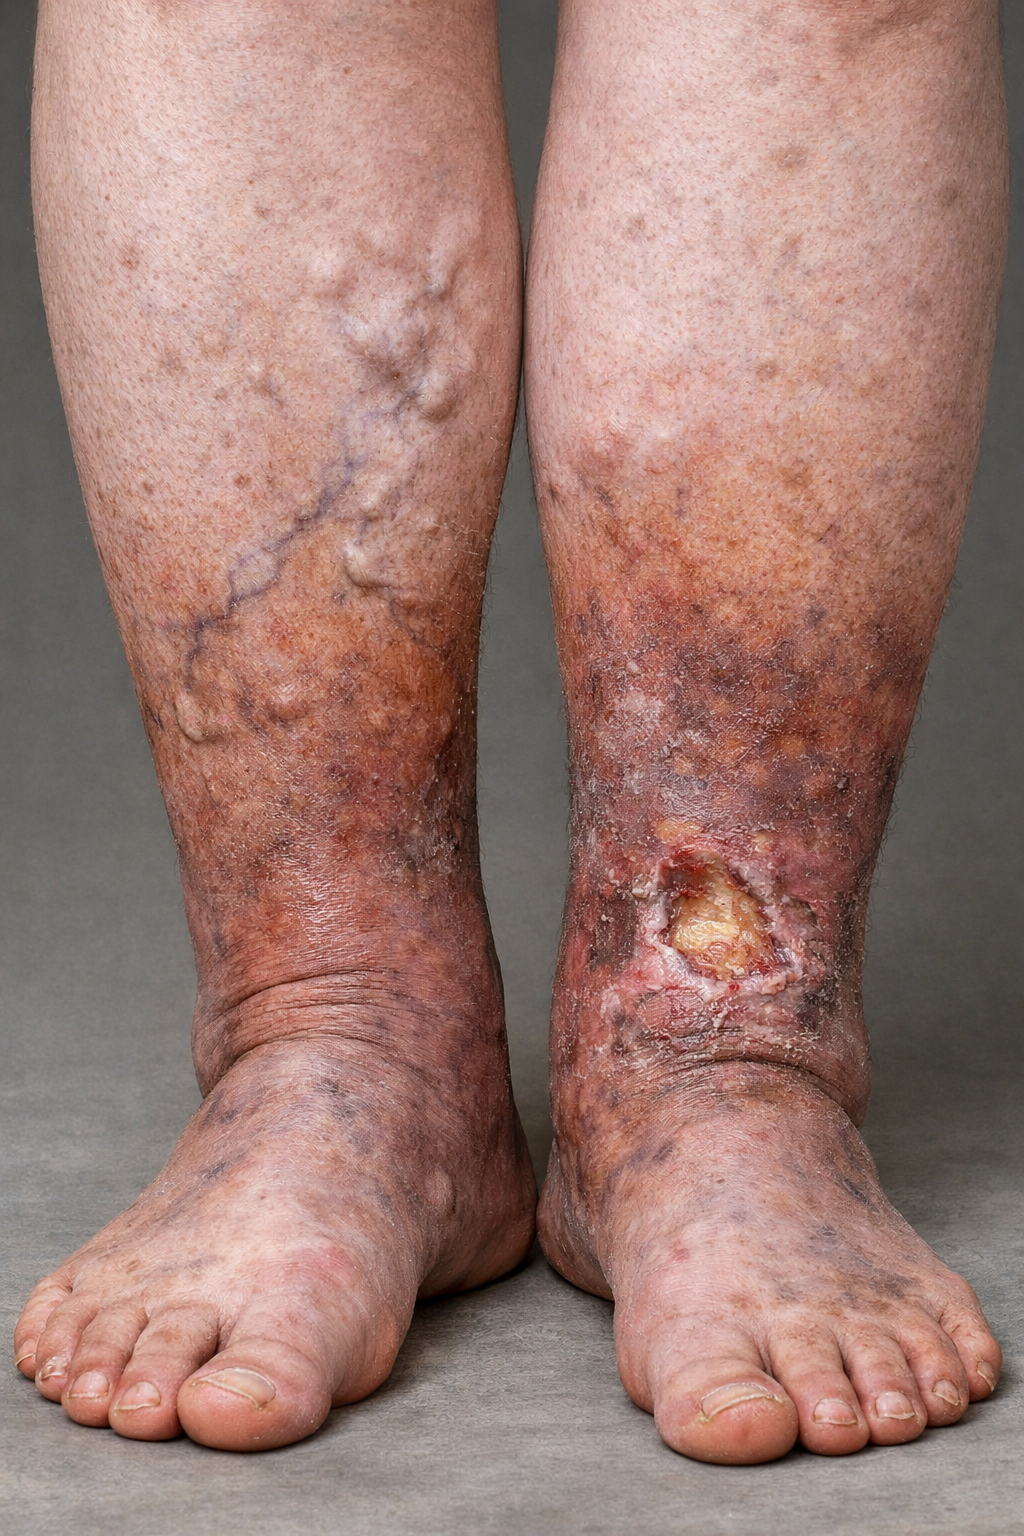
In Australia, Chronic Venous Insufficiency (CVI) affect more women than men, with a ratio of 25%–40% in women and 10%–20% in men (Al Shammeri et al., 2014). As a consequence of this condition, swollen legs are a common concern. CVI occurs when the veins in the legs struggle to return blood efficiently back to the heart, often leading to leg swelling, heaviness, aching, and visible varicose veins. At Melbourne Massage and Treatment in Coburg, since I specialised in Lymphoedema therapy, I regularly support clients experiencing leg swelling related to venous conditions too. Understanding how to manage the condition can significantly improve comfort, mobility and long-term leg health. What Is Chronic Venous Insufficiency? Chronic venous insufficiency is a condition defined as chronic when lasting for more than 3 months. CVI develops when the valves inside the leg veins become weakened or damaged and stop acting as they should, which is why blood finds difficulty in flowing back to the heart. This results in swelling in the lower legs. Common symptoms include: Persistent swelling in the lower legs or ankles Aching, heaviness or fatigue in the legs Skin changes such as dryness or discolouration Varicose veins Tightness or discomfort after prolonged sitting or standing Without appropriate management, CVI can progress and increase the risk of skin complications or infection. The Different Levels of Chronic Venous Insufficiency Find below a table that describes how Clinical, Etiological, Anatomical, and Pathophysiological (CEAP) classify chronic venous insufficiency. Stage Description C0 No visible/palpable signs of venous disease C1 Telangiectasias or reticular veins C2 Varicose veins C3 Oedema C4 Skin changes secondary to chronic venous disease (haemosiderin, lipodermatosclerosis, atrophie blanche) C5 Healed ulcer C6 Recurrent active venous ulcer The more advanced the stage, the more likely the hospitalisation of the patient for infections. This is not only a cost to the public health system, but to the Australia popolation too. Compression Therapy: A Key Part of Managing Swollen Legs The most effective way to manage swelling related to Chronic Vein Insufficiency is compression therapy. Compression garments are helpful as they apply controlled pressure to the legs, which supports the veins and encourages blood and fluid to move back toward the heart. Unfortunately, there is no quick fix for swollen limbs, and for many people with chronic swelling, compression becomes an essential part of daily management. But, you have to be aware that compression should always be prescribed and fitted appropriately. Indeed, the compression has to have the right gradient pressure, so stronger pressure at the bottom and weaker at the top; otherwise, we risk getting the liquid stuck in the leg and not moving. On the other hand, with certain arterial conditions, compression may not be suitable; therefore, it is important that you talk to your GP about getting a referral to a vein specialist to know what’s the best approach for your swollen legs. When Varicose Veins Are Present If varicose veins are present, low-level compression is often recommended initially. This provides gentle support to the venous system while remaining comfortable for everyday use. The goal is to: Support vein function Reduce fluid build-up Improve comfort during daily activities Help prevent worsening swelling In fact, each individual may require a different compression level depending on their condition and tolerance, but also the integrity of the skin. Compressions indeed are tight to put on, and for those with weak and fragile skin, it can be difficult to maintain skin integrity while wearing compression. Why Flat-Knit Compression Garments Are Often Recommended For clients with persistent swelling or changes in limb shape, flat-knit compression garments are frequently recommended. Flat-knit garments offer several advantages: They provide stronger containment for swelling They can be custom-fitted for better comfort and effectiveness – class 3 and 4 They help prevent fluid from accumulating in specific areas They are often more suitable for long-term management Because every leg shape and swelling pattern is different, proper measurement and fitting are essential. At Melbourne Massage and Treatment, Lymphoedema clinic in Coburg, I provide assessments and measurements for your swollen legs, so that I can provide garments that fit you for your specific presentation. Accessing Compression Garments Through the SWEP Program (Victoria) If you live in Victoria, you may be eligible to access compression garments through the SWEP program (State Wide Equipment Program). SWEP helps eligible residents obtain essential medical equipment, including compression garments used in the management of venous conditions and lymphatic swelling. As a SWEP-registered therapist, I can guide clients through the process, including: Clinical assessment Measurement for appropriate compression garments Assistance with the SWEP application process Ongoing monitoring and adjustments The SWEP is free to access and does provide funding for 4 garments a year, specifically: $150 per garment if off the shelf $300 per garment if made on measurements For Chronic Vein Insufficiency, most often the off-the-shelf garments are the ones to go for. But still, you have to know what class would best work for you, and what size would best work for you. Movement: An Often Overlooked Therapy Movement, as per my favourite medicine, is another important component in managing swollen legs. In fact, blood flow, but even lymph flow, happens better when muscles contract and work. For the legs, the calf muscles act as a natural pump, helping push blood and fluid upward when we walk or move. When we remain seated or standing for long periods, this pump becomes less effective. Simple strategies include: Regular walking Gentle ankle movements during long periods of sitting Light leg exercises Avoiding prolonged immobility when possible Even small amounts of regular movement can make a noticeable difference in managing swelling. Protecting the Skin: A Crucial Step in Preventing Infection People with chronic leg swelling are more vulnerable to skin breakdown and infection, and this is due to a series of reasons, such as: Increased venous pressure damages small blood vessels Reduced oxygen and nutrient delivery to the skin Chronic swelling stretches and weakens the skin Inflammation causes skin changes Keeping the skin healthy is […]

Mar
At Melbourne Massage and Treatment in Coburg, as a clinical Myotherapist, I am enthusiastic to offer 1:1 fitness class that aim to improve your wellbeing and body strength. And one thing that I will never stop surprising my clients with is that it is never too late to start working on their strengths, no matter their age, gender, and capacity. Whether you’re recovering from injury, managing persistent pain, navigating age-related changes, or simply want more energy and confidence, personalised fitness is transformative. Why Starting Now A 1:1 Fitness Class Matters? Strength Training Improves Physical Health at Any Age Have you ever heard an older person wishing to be weaker? No, don’t you? That’s why strength and resistance training aren’t just for elite athletes or bodybuilders; they’re essential for everyone. As we age, our body’s natural capacity to regenerate, including regenerating muscle mass and strength, bone density, and other body tissues, naturally declines, which can affect balance, mobility, fall risk, and independence. Resistance training reverses this decline and improves functional outcomes. A systematic review by Kashi K. S. et al. (2023) found that resistance training significantly improved muscle strength, physical function, and reduced symptoms of depression in older adults. Exercise Matters for Mental Health Too Exercises are not only the best way to maintain physical health but also have an immense impact on our mental health. And that is a 1:1 fitness class or a group class, regular exercises can really change how you feel within your head. Infact, we have plenty of evidence from Recent Research that looks into this: A review by Ayaz A. et al. (2026) highlights how aerobic, resistance, and mind-body exercise modalities have psychological benefits, from improved mood to reduced stress and anxiety. Study by Ma Y. and Mumtaz S. (2025) finds that structured exercise programs improve mental well-being by activating neurobiological and psychosocial pathways. Meta-analysis by Rossi E. (2024) showed that strength training has moderate and significant antidepressant effects in adults with depressive symptoms. So yes, your workouts aren’t just changing your body, but they’re changing your brain. Why 1:1 Fitness Classes Are Especially Effective While training is beneficial for everyone, for physical and mental health, personalised training, like a 1:1 fitness class, makes a huge difference, and here’s why: Training Tailored to You Everyone has different goals when starting a fitness journey, or while they are training, and everyone has different needs and capacities, on which the goal is shaped. Therefore, a 1:1 fitness class session allows for customised programming that matches your goals, health history, injury status, and movement patterns, which generic videos or crowded group classes rarely provide. Expert Guidance Prevents Injury At Melbourne Massage and Treatment, I am proud of the studies I done (a Bachelor in health science clinical myotherapy, and following courses like the KLT training) and the effort I put in place to improve my fitness and communication skills, which led me to offer a tailored program for any of my clients. For people with pain, past injuries, or chronic conditions, this is crucial. Motivation and Accountability I often come across clients who don’t feel confident enough in themselves, who don’t like the gym and think that strength training for them is not a thing. And that’s when I can’t stop thinking about how powerful it is to change their mind by showing them how a few minutes of well-done movement, either with or without load, can change everything. That’s when I get them in for Fitness Class here in Coburg, and I help them achieve their goals. Personalised Follow-up On top of a tailored 1:1 fitness class in person, what makes the difference in terms of service here at Melbourne Massage and Treatment, when I show some exercises, I will send you a PDF file with the picture and the description of the exercises, to ensure you will be bale to replicate those exercises anywhere you are ay your own time and comfort. Fitness Class Comes With An Added Bonus — Better Bone and Cardiovascular Health The action of lifting weights and lifting heavy is seen from your body as a positive stress, which creates a concatenation of benefits. Along those we find: Bone regeneration – increase of bone density Maintaining metabolic health Improving markers related to heart disease and diabetes Improve or maintain optimal equilibrium – poor equilibrium is the major cause of falls. And more… All the benefits a fitness class can deliver are crucial as we age. No one, as they age, wishes that their health gets more and more compromised, isn’t it? Start Where You Are — It’s Not About Perfection Whether you’ve never stepped foot in a gym before, you’re returning after an injury, or you’re trying to break a cycle of inactivity, the best time to start was yesterday. The next best time is now. It is never too late to start working on your strength, and this is the most important message I find myself passing on to my clients. The body can always adapt to load. And no matter if you have just started or you are a pro, you will always have to face some challenges. Therefore, start working on your mobility, improve the way your body can move, let’s than load it a little at the time, and build your own journey into wellbeing day by day, fitness class after fitness class. Final Thoughts You don’t need to be “fit enough” to start a 1:1 fitness class, and it’s absolutely never too late. Here’s the truth I’ve seen in across many clients: People in their 40s, 50s, 60s, and beyond see meaningful gains, both physically and mentally. Individualised guidance accelerates progress safely. Strength and structured exercise improve both quality of life and mental well-being. If you’ve been thinking about starting a fitness journey, come and talk to us at Melbourne Massage and Treatment, Coburg. For those who decide to commit to a change, a positive change, for their well-being, there are 5 or 10 class packages […]
Feb
If you’re searching for lymphatic therapy in Coburg, it’s common to see terms like Manual Lymphatic Drainage (MLD) and Lymphatic Massage used interchangeably. As a clinical myotherapist with specialised training in lymphoedema management (MLD since Nov 2021; lymphoedema therapy since Oct 2024, trained with the Vodder Academy), I am here to clarify exactly what these treatments are and why one is clinically recommended over the other — especially for conditions like lymphoedema or post-surgical swelling. In fact, the importance of understanding the difference between MLD and Lymphatic Massage is vital when you want results that matter, and not just temporary relaxation. What Is Manual Lymphatic Drainage (Vodder Method)? Manual Lymphatic Drainage (MLD) is a specialised technique developed by Emil and Estrid Vodder in the early 20th century, and it is characterised by gentle, rhythmic hand movements to stimulate the lymphatic system. The reason behind the gentle and light movement is to ensure that during the treatment, we can stretch the skin and let it recoil naturally; therefore, we stimulate the lymphatic system at its full potential. Therefore, MLD is not a “massage” in the spa sense, it’s intentionally structured to follow physiological lymphatic pathways to support lymph flow. Key points about MLD: Trained practitioners follow evidence-based protocols. Movements are light, rhythmic, and intentional, not vigorous. The “Vodder method” is internationally recognised and taught with strict standards. It is often integrated into Complete Decongestive Therapy for lymphoedema. One recent article explains the theoretical physiology and clinical context of MLD in lymphoedema management. Manual lymphatic drainage: the evidence behind the efficacy (PubMed) What Is Lymphatic Massage? “Lymphatic Massage”, on the other hand, is more of a broad term used in wellness settings, like a SPA or massage parlour. The wordling is really similar to Manual Lymphatic Drainage, and is often followed by promises of “encourage fluid movement” or “before and after photos” but: Technique quality varies widely by practitioner. Some methods use deeper pressure and general strokes. It’s largely relaxation-focused, not always aligned with lymphatic anatomy. It isn’t generally part of evidence-based protocols for clinical conditions. In short, MLD is a clinically structured intervention; lymphatic massage is not. Indeed, who promotes Lymphatic massage as a service, often don’t know the pathway of the lymphatic system, and can’t tell you the difference between a Lymphoedema or a Lipoedema, and it may try to sell the fact that Lymphatic massage would detox your body (I will write a blog soon about this detox topic, as it is one of the biggest scam in the health and beauty industry). Side-by-Side: MLD vs Lymphatic Massage In the table below is a summary and a comparison between MLD and Lymphatic Massage features. Feature Manual Lymphatic Drainage (Vodder) MLD Lymphatic Massage Based on lymphatic anatomy ✔ ✖ Evidence-aligned technique ✔ ✖ Suitable for lymphoedema management ✔ ✖ Commonly used post-surgery ✔ ✖/varies Practised by trained therapists ✔ ✖ (wide variation) Relaxation / general wellness ✔ ✔ Clinical Evidence: What Research Shows About MLD and Lymphatic Massage As with any form of therapy, even in the case of MLD, the clinical research on MLD isn’t perfect, but the PubMed literature supports its role when used correctly within clinical programs. Lymphoedema Management A randomised controlled trial (RCT) reported that women with breast cancer–related lymphoedema experienced significant limb volume reduction and improved symptoms with MLD as part of therapy. A comprehensive systematic review found mixed outcomes but noted MLD’s accepted role in conservative lymphoedema treatment and generally positive effects on swelling and quality of life when integrated with other therapies. Inflammation & Post-Surgery Support MLD is also used, and clinical studies provide evidence in the setting of postoperative swelling and pain with orthopedic and cosmetic surgery. Indeed, post-surgery, the body responds with inflammation and swelling, which passes the acute phase, and the clearance of infections is better when moved to ensure the best recovery. Why MLD Is Clinically Preferred for Lymphoedema When lymphatic transport is impaired, as in lymphoedema or after surgery, the goal is not just temporary fluid “movement,” but supporting lymphatic drainage physiology. Here’s what clinical practice guidelines emphasise: Targeted Stimulation MLD uses gentle but precise hand movements that align with superficial lymphatic pathways and node groups. These are designed to: reduce interstitial fluid accumulation, activate lymphangiomotoricity, and facilitate fluid transport without trauma. This principle comes directly from the Vodder methodology as taught by the Vodder Academy. Part of a Larger Management Strategy Especially in lymphoedema, MLD is one component of a broader therapeutic approach that includes: ✔ compression therapy✔ movement and exercise✔ skin care and infection prevention This integrated strategy has been shown to improve outcomes more than any single therapy on its own. Post-Surgical Considerations As discussed in more depth in another blog, when heading for cosmetic and orthopaedic surgery, the recovery process is caractherised by an acute phase of swelling. That’s just teh body dping its thing. But, as we move away from the acute phase, it is essential to ensure that the oedema is reduced. That’s where MLD and compression therapy are essential. In fact, unlike a typical deep massage: MLD supports lymphatic flow without stressing fragile tissues. Studies show gentler lymphatic stimulation improves swelling and trismus after surgery. That’s why many rehabilitation specialists recommend structured MLD over general “lymphatic massage” in this context. So, What Should You Choose? As per everything, I reckon that your choice has to be aligned with your goal. Therefore: If you need clinical-grade lymphatic support for lymphoedema, post-surgical swelling, or ongoing fluid dysfunction, choose Manual Lymphatic Drainage (Vodder method) delivered by a trained clinician. If you want general relaxation and mild fluid support, a lymphatic massage in a wellness setting might feel nice — but it’s not a clinical substitute for MLD in these conditions. Conclusion From A Clinical Practitioner At Melbourne Massage and Treatment, Coburg, I integrate MLD with evidence-based clinical reasoning, and not just as a “feel-good massage.” My approach is rooted in training with the Vodder Academy and ongoing lymphoedema therapy practice. If you’re concerned about lymphatic […]